So you’ve built your great new super awesome macOS or iOS app. Your app has gone viral, and sales are going great! What’s next? Well, the obvious smart choice is localization.
What is Localization?
Localization involves translating your app, and making changes to the way dates and currencies are displayed, and possibly even changing your UI/UX to better support different cultures. This article will focus on how exactly you go about translating your app strings into another language. I’ll go through the process for a super simple app.
Translating your app strings - step by step
Convert all Strings to NSLocalizedStrings
This will be the single most time consuming part of the process along with the actual translation of the resulting Xliff file. You will need to convert any strings which are defined in code and will be displayed in your app - into NSLocalizedString which the system can switch between at runtime. Its a simple process, and involves searching through your code, and convert all Strings into localizedStrings. So code like this:
var runText = "Minim is running in Block mode"
should be changed like so:
var runText = NSLocalizedString("Minim is running in Block mode", comment: "Running status label")
You obviously should choose a comment which will give the translator a hint as to what the string is used for.
Here’s another example in Objective C:
NSString *title = @"Preferences";
becomes this:
NSString *title = NSLocalizedString(@"Preferences", @"Common title for Preferences window");
Add a new language to your app
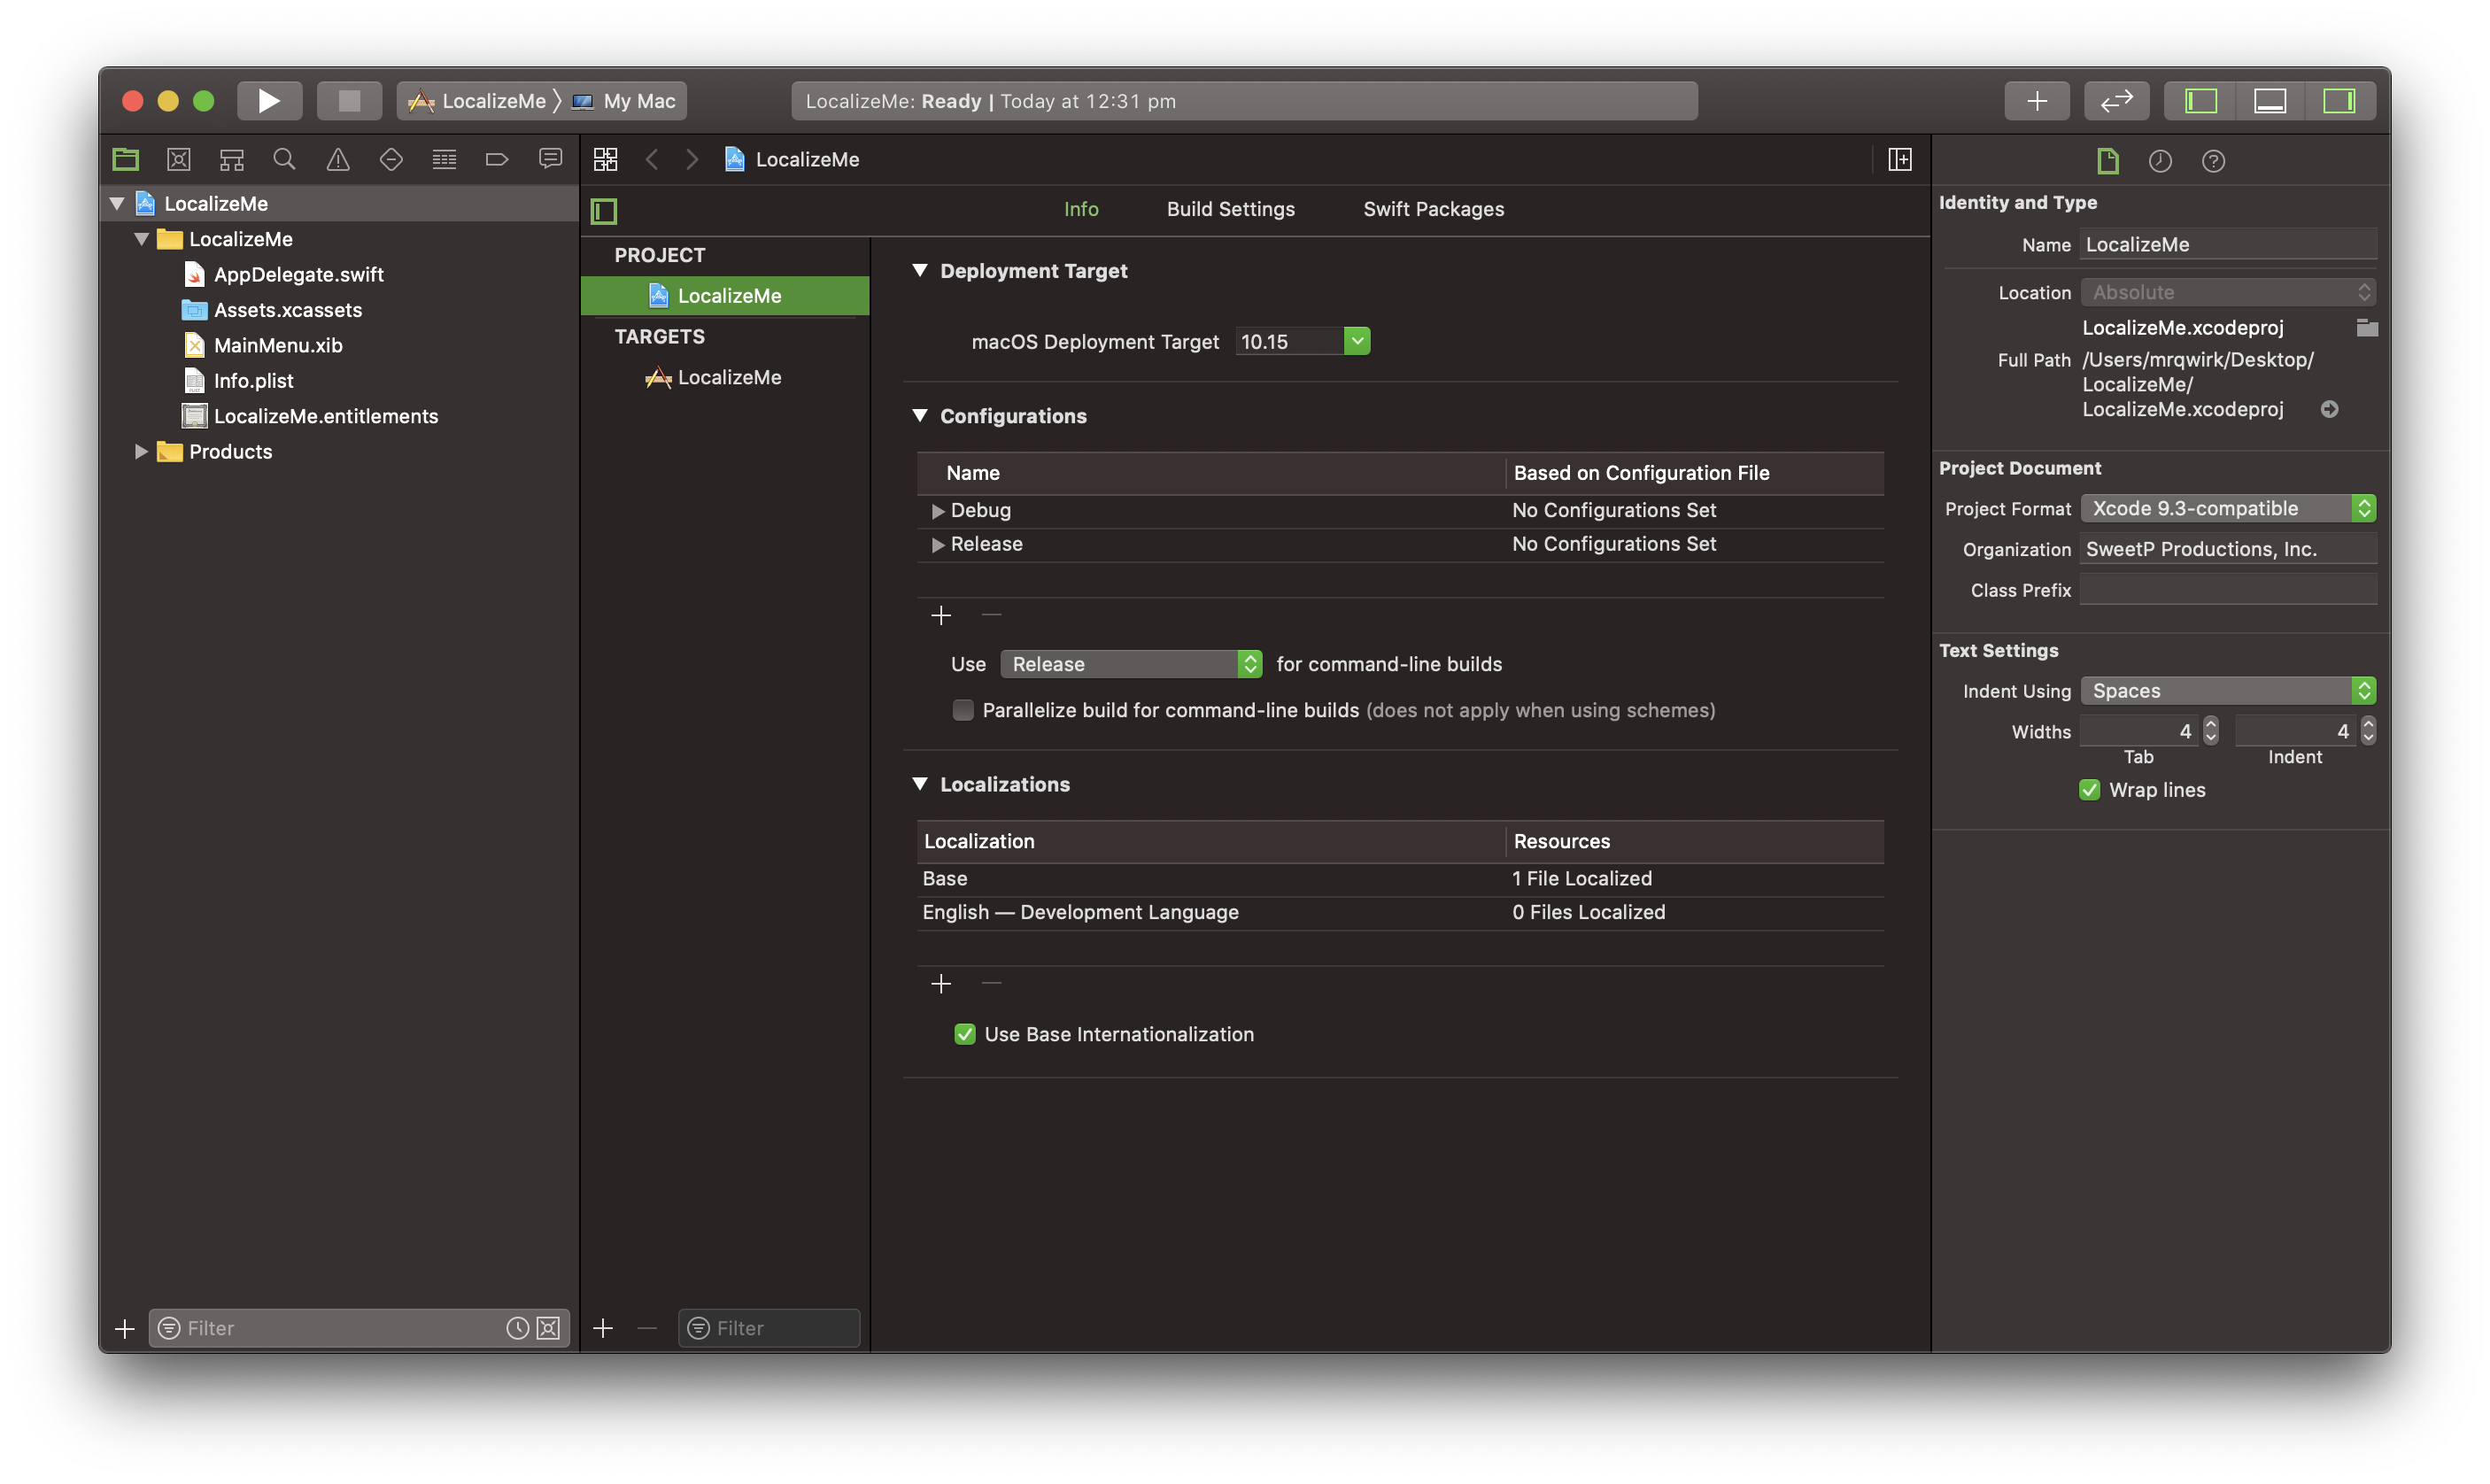 The Project Info tab in Xcode
Once the you have all your strings ready, it’s time to add the new language. Select the top-most file in your file structure. (it will most likely be your project name) Then click on the Info tab, and select your PROJECT name - making sure not to select one of the TARGETS. The PROJECT icon will have the generic Xcode file icon.
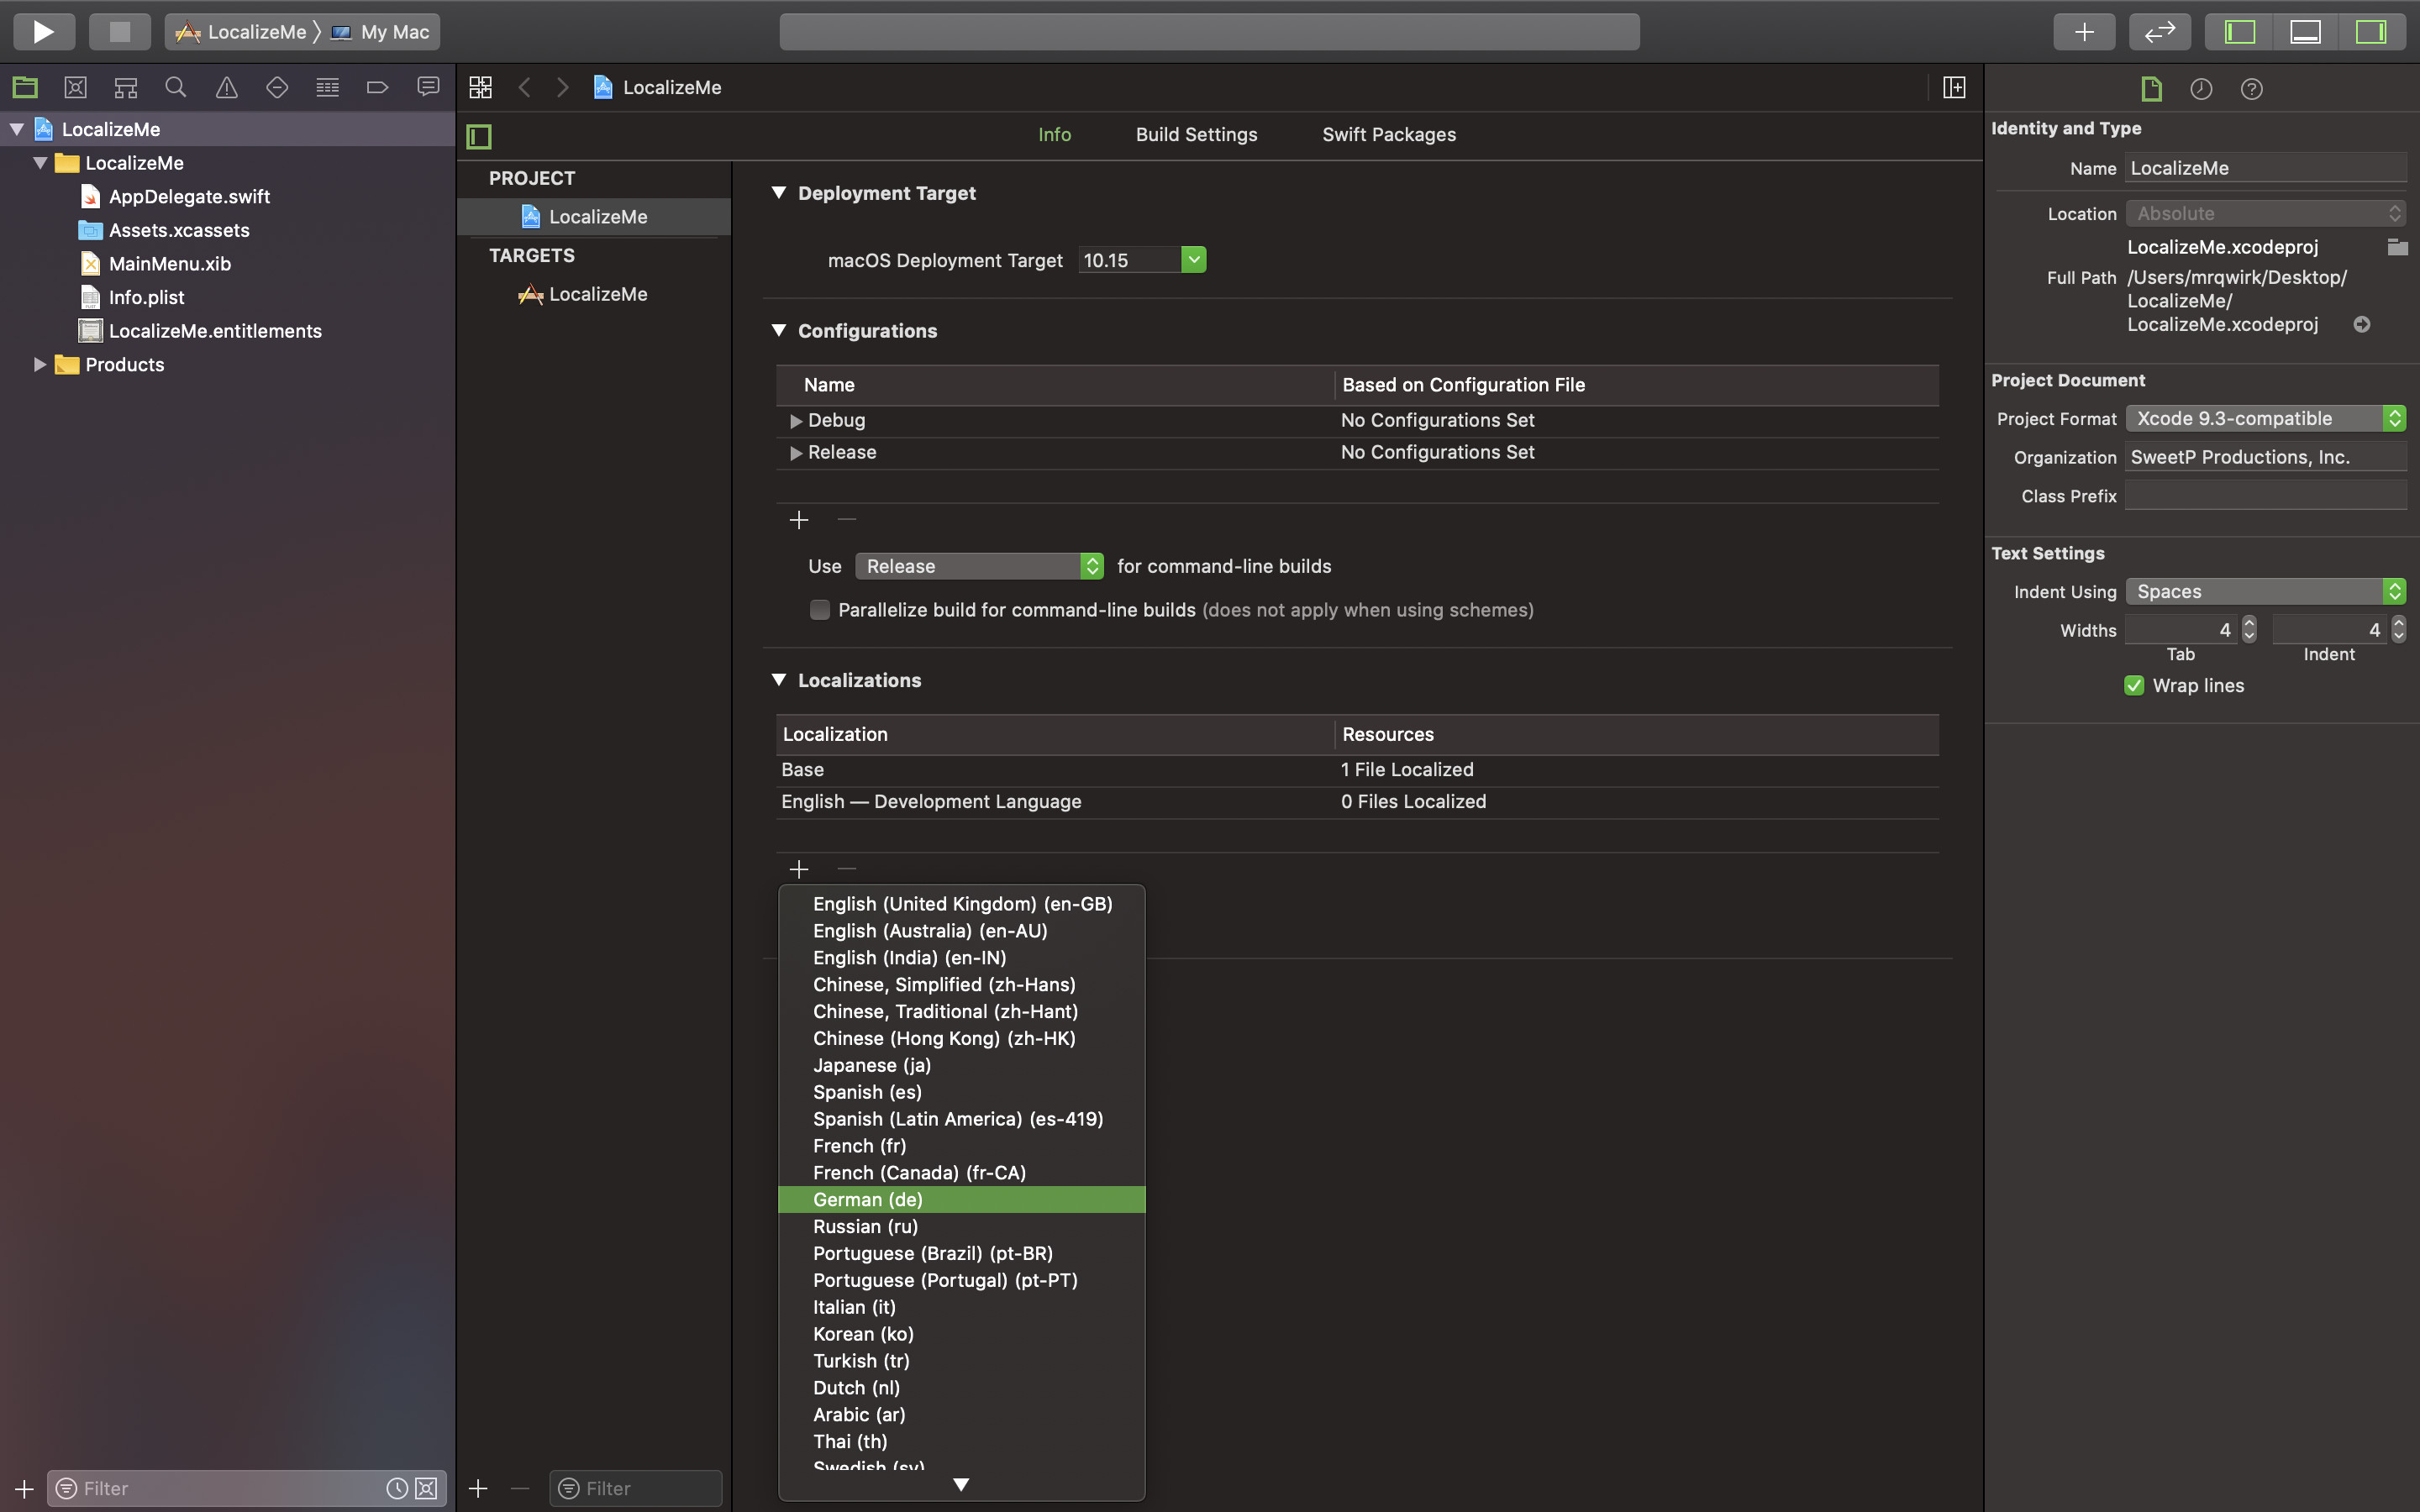 Choose a language to add
Now we can add the new language. Look for the Localizations heading in the main Xcode panel, and expand it (if it’s not already) Then click the plus button, and select the language you wish to add. Your app should now technically be localized… But of course we now need to actually translate the strings.
Make sure to select all the files you want translated, before hitting the Finished button.
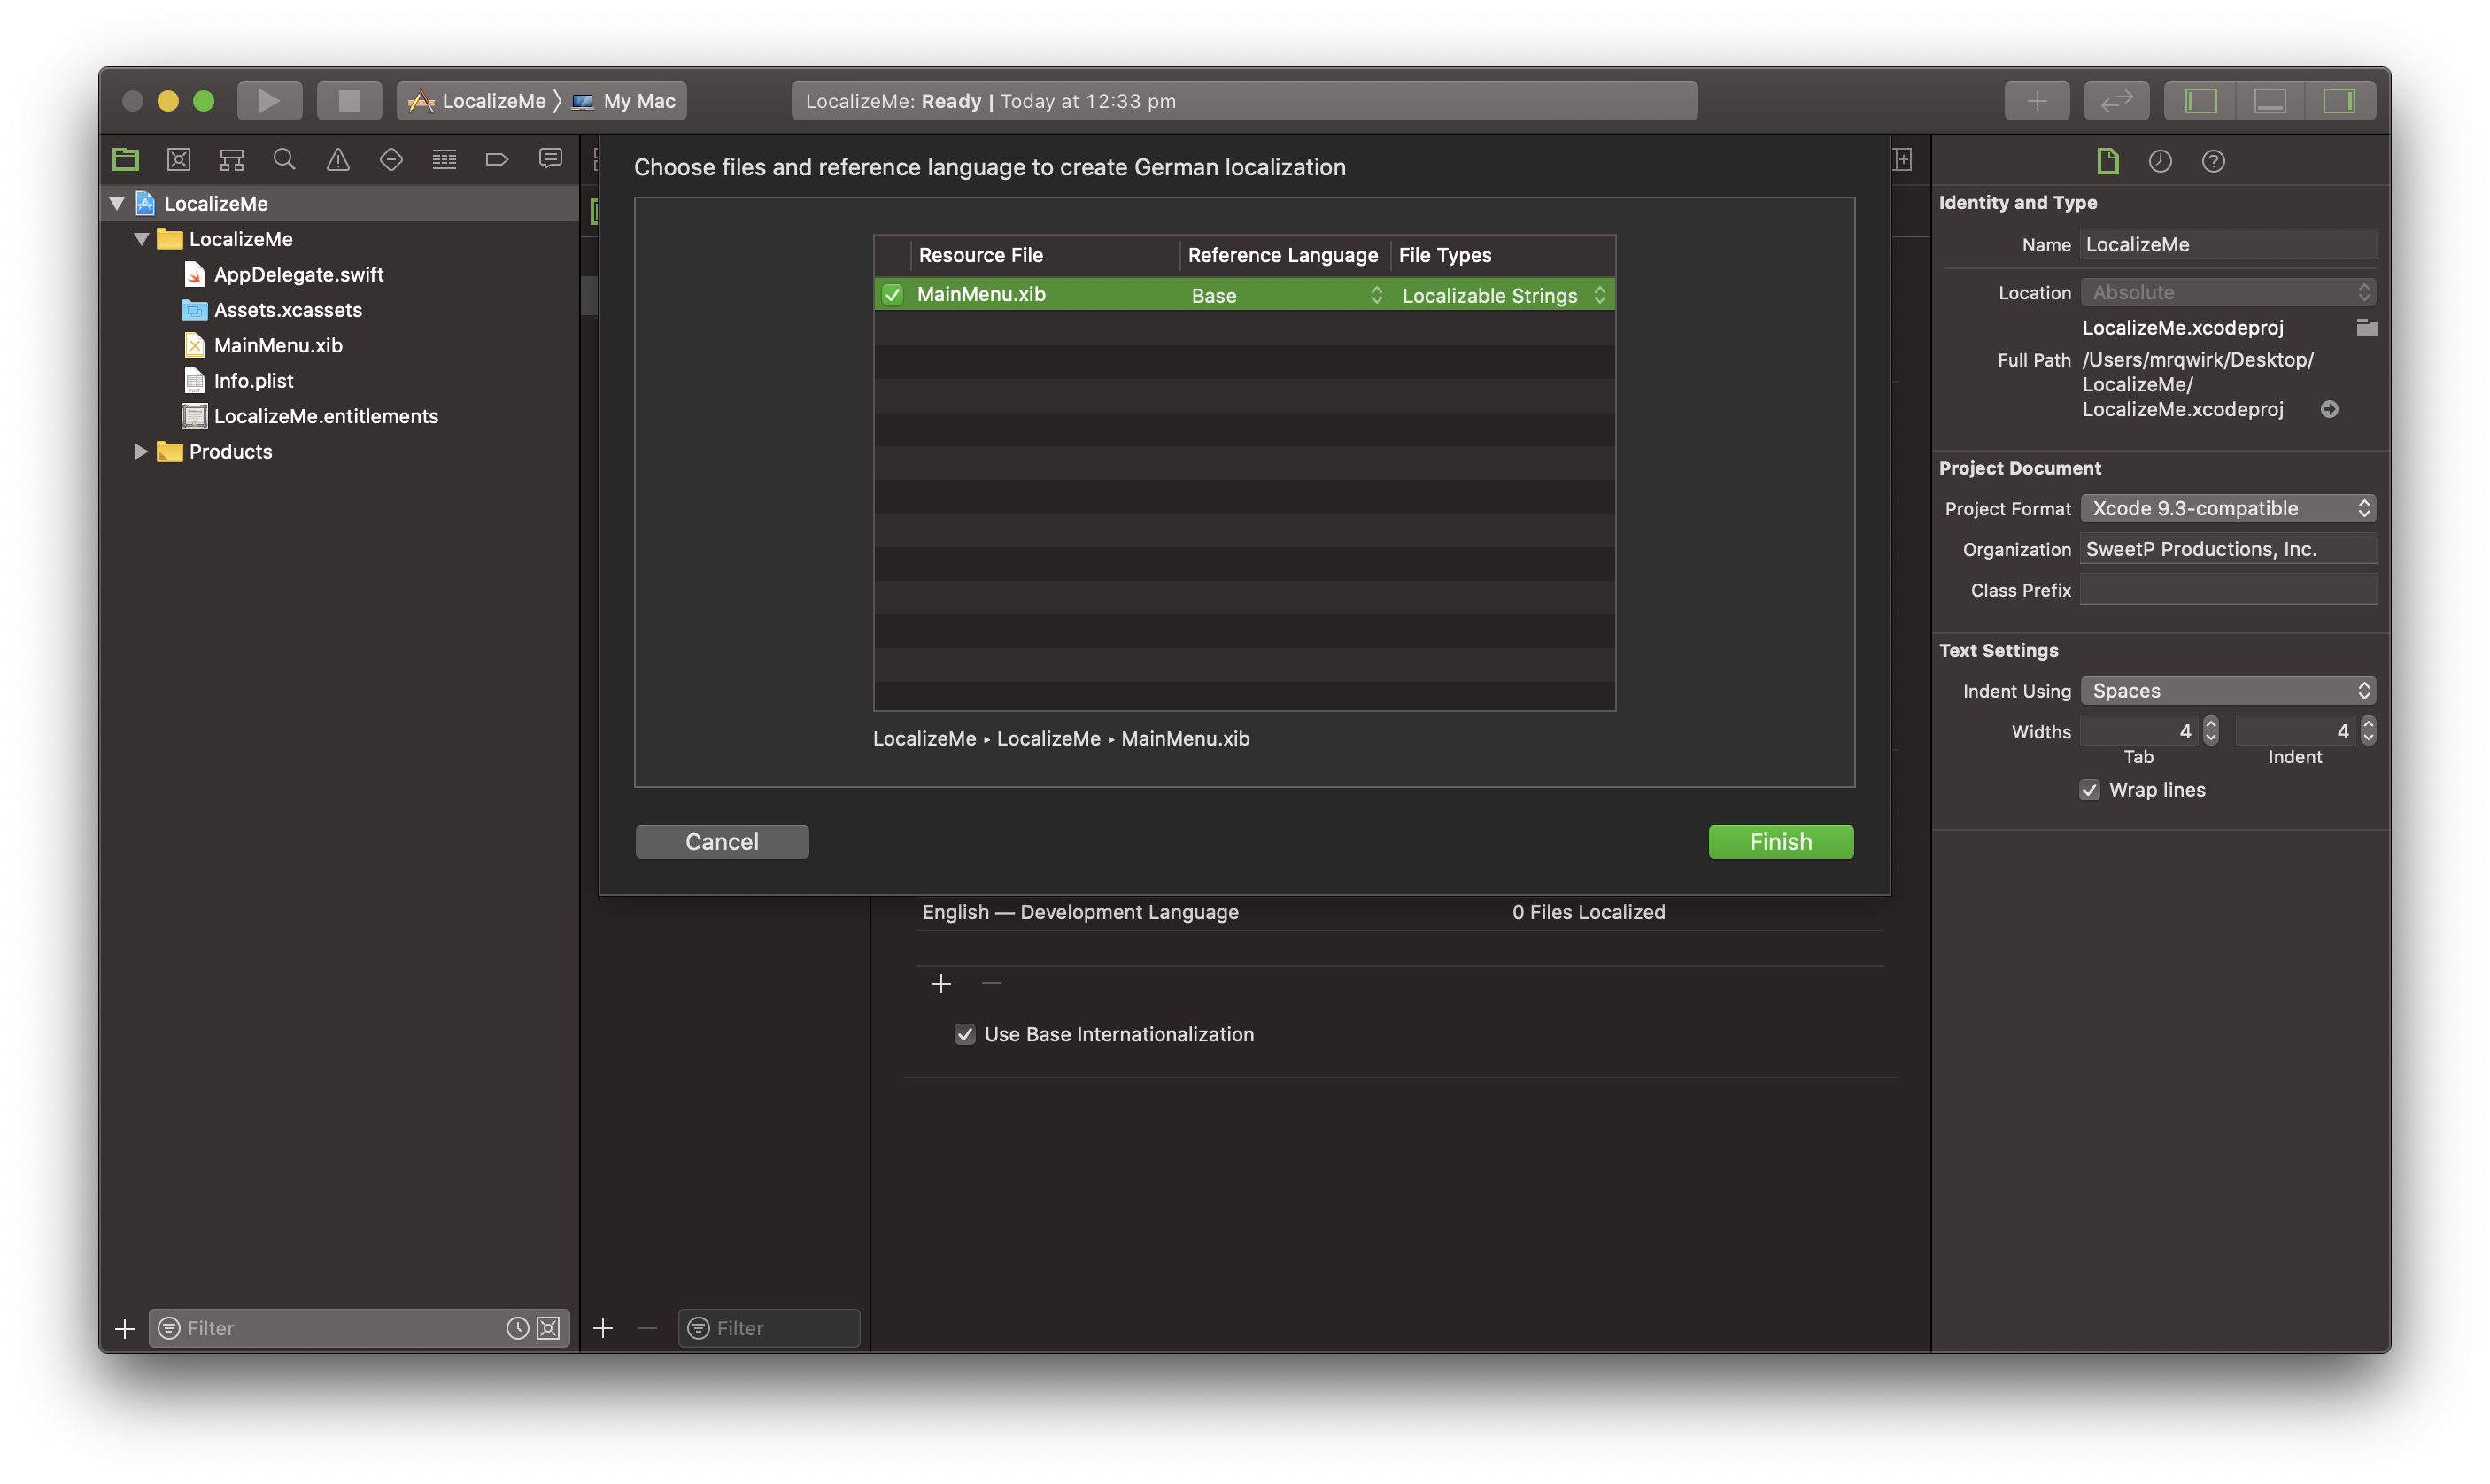 Select files to localize
Export for Localization…
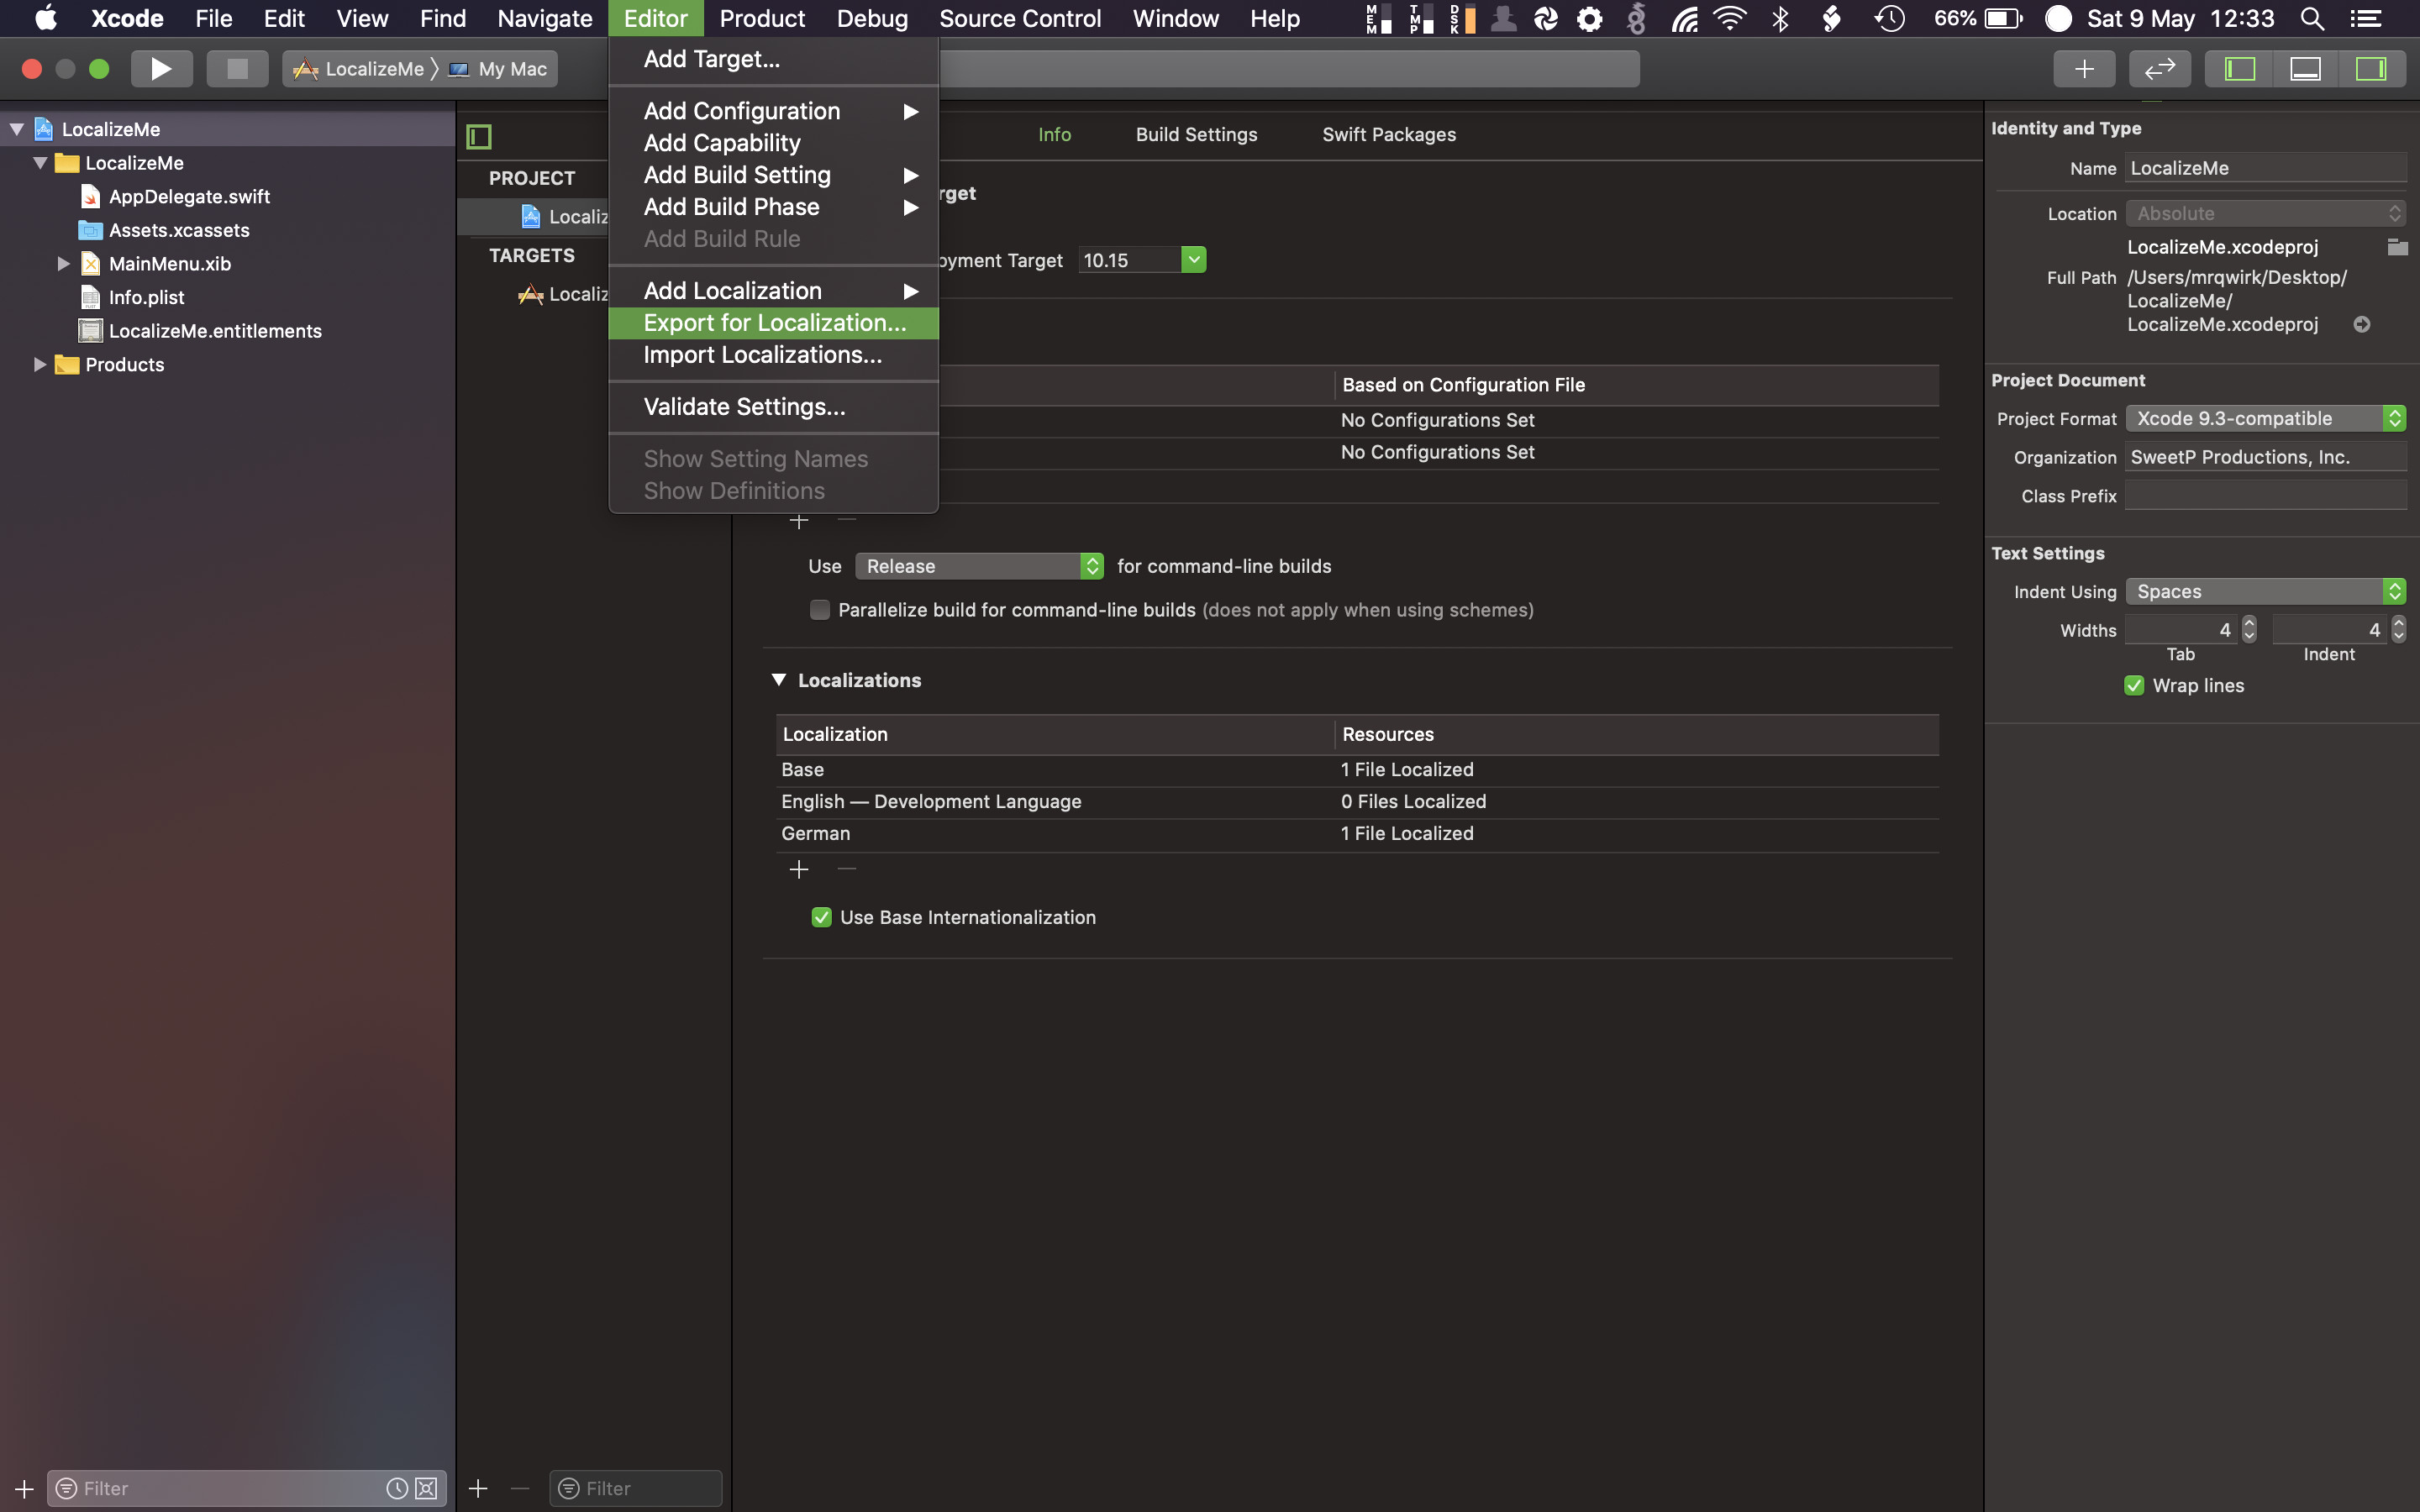 The Project Info tab in Xcode
Keep your Project selected in Xcode (other wise the Export option won’t be available), Click the Editor menu in the system Menubar, then select Export for Localization... in the dropdown. You’ll select which languages to export in the next step.
Choose which languages you want to export for translating, and hit Export. Xcode will export all the resources required for localizing our app.
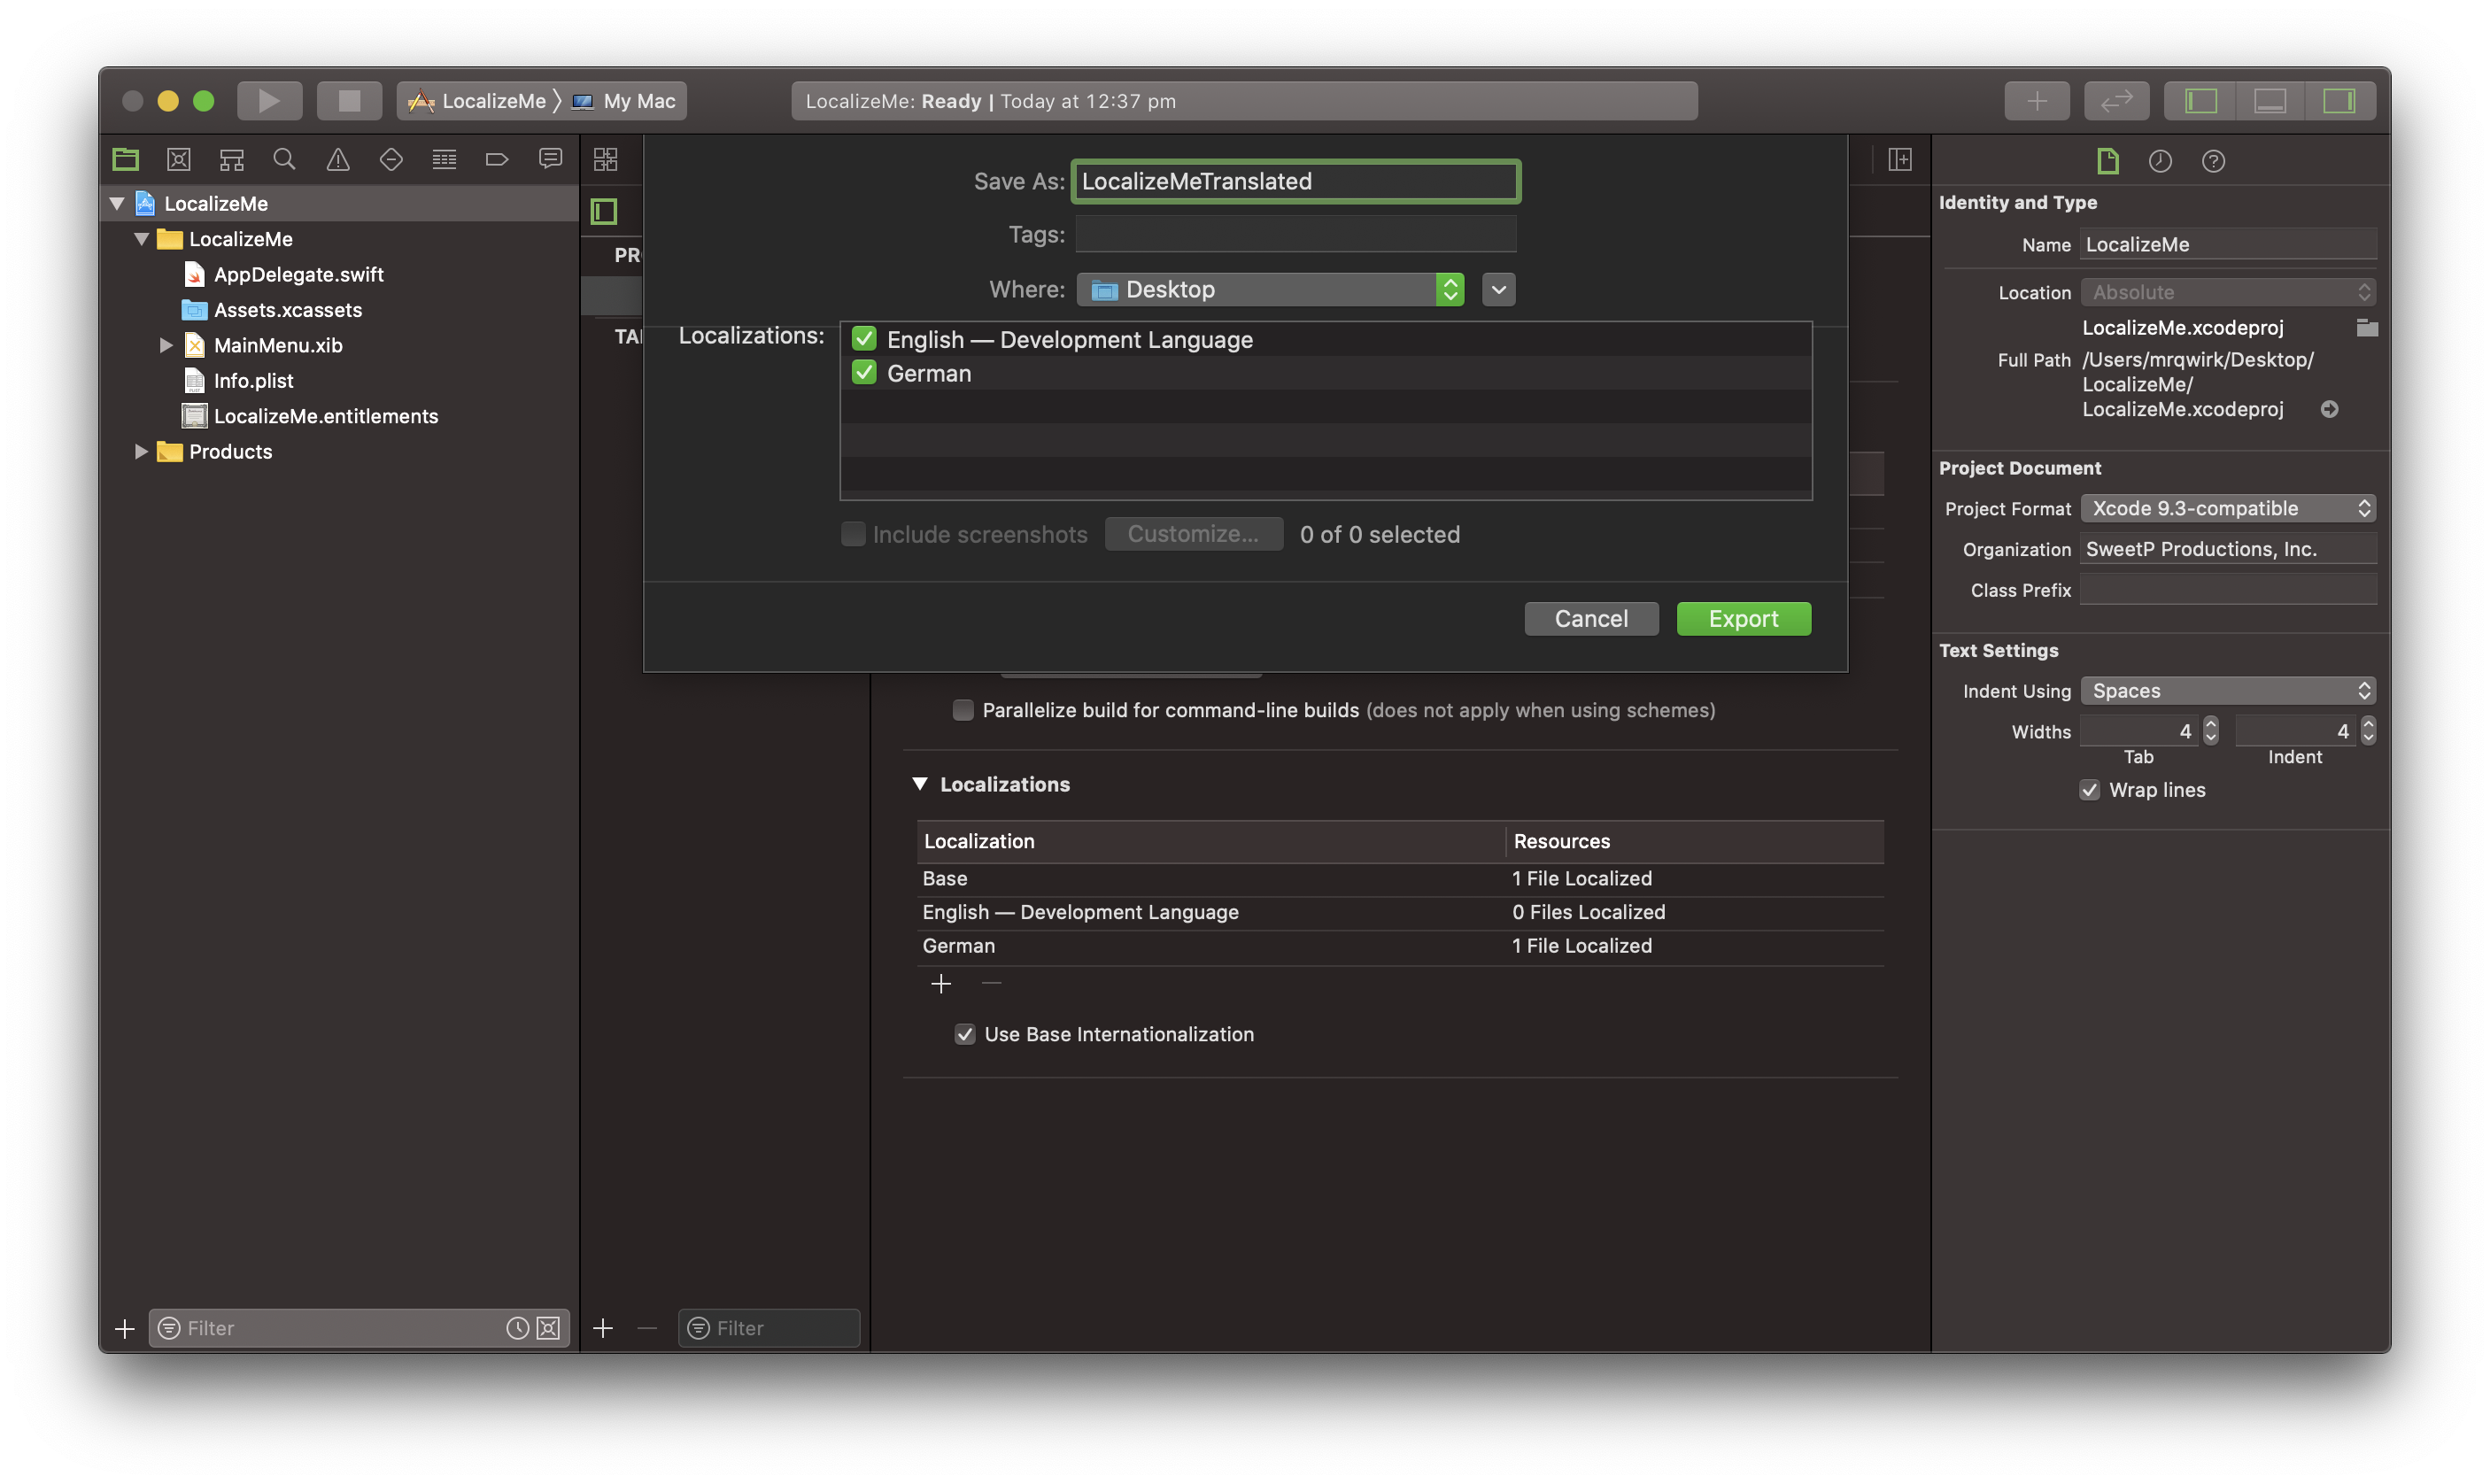 Export
Locate the xliff file for your translator
Our translator only needs the xliff file, so we need to dig into the exported folder to locate it. You will find it in the following location:
ProjectName/lang.xcloc/Localized Contents/lang.xliff
Send the file away to your translator for translation!
Translating the xliff file
We don’t need to go into specifics, but your translator will need an app to open and edit the file you just sent them. Any app which supports xml files will do, although a specialized xliff editor such as Xliff Editor will be better suited to the job.
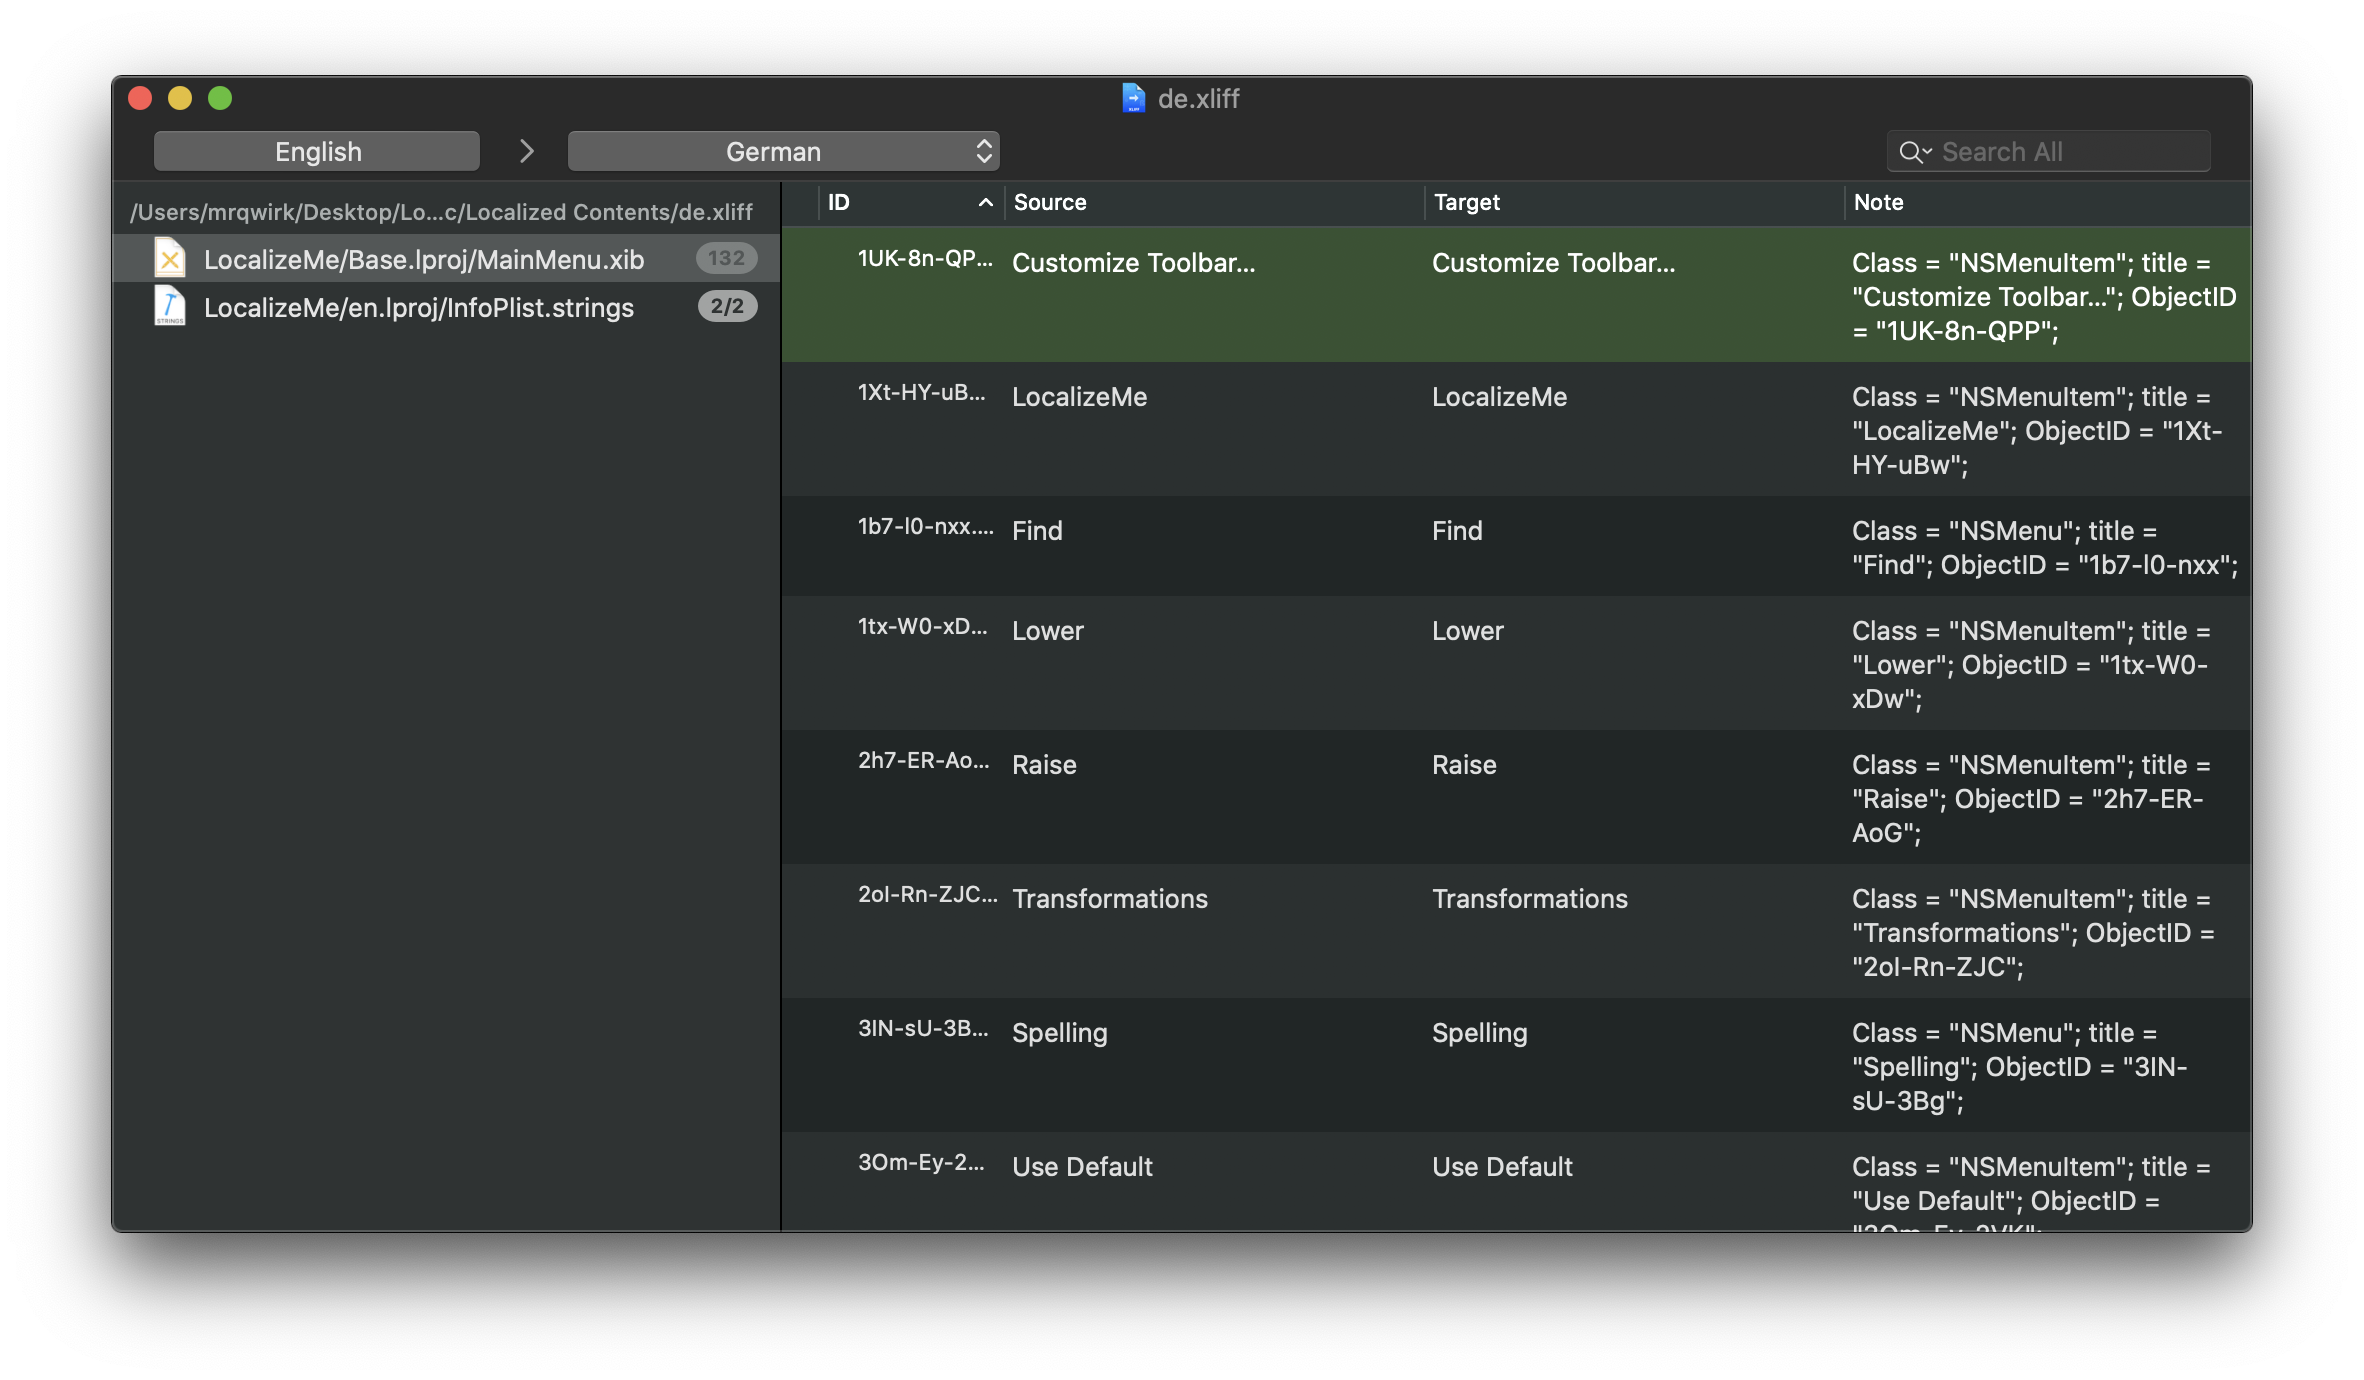 Localizing with Xliff Editor
Import the translated xliff back into your Project
 Import the xliff file
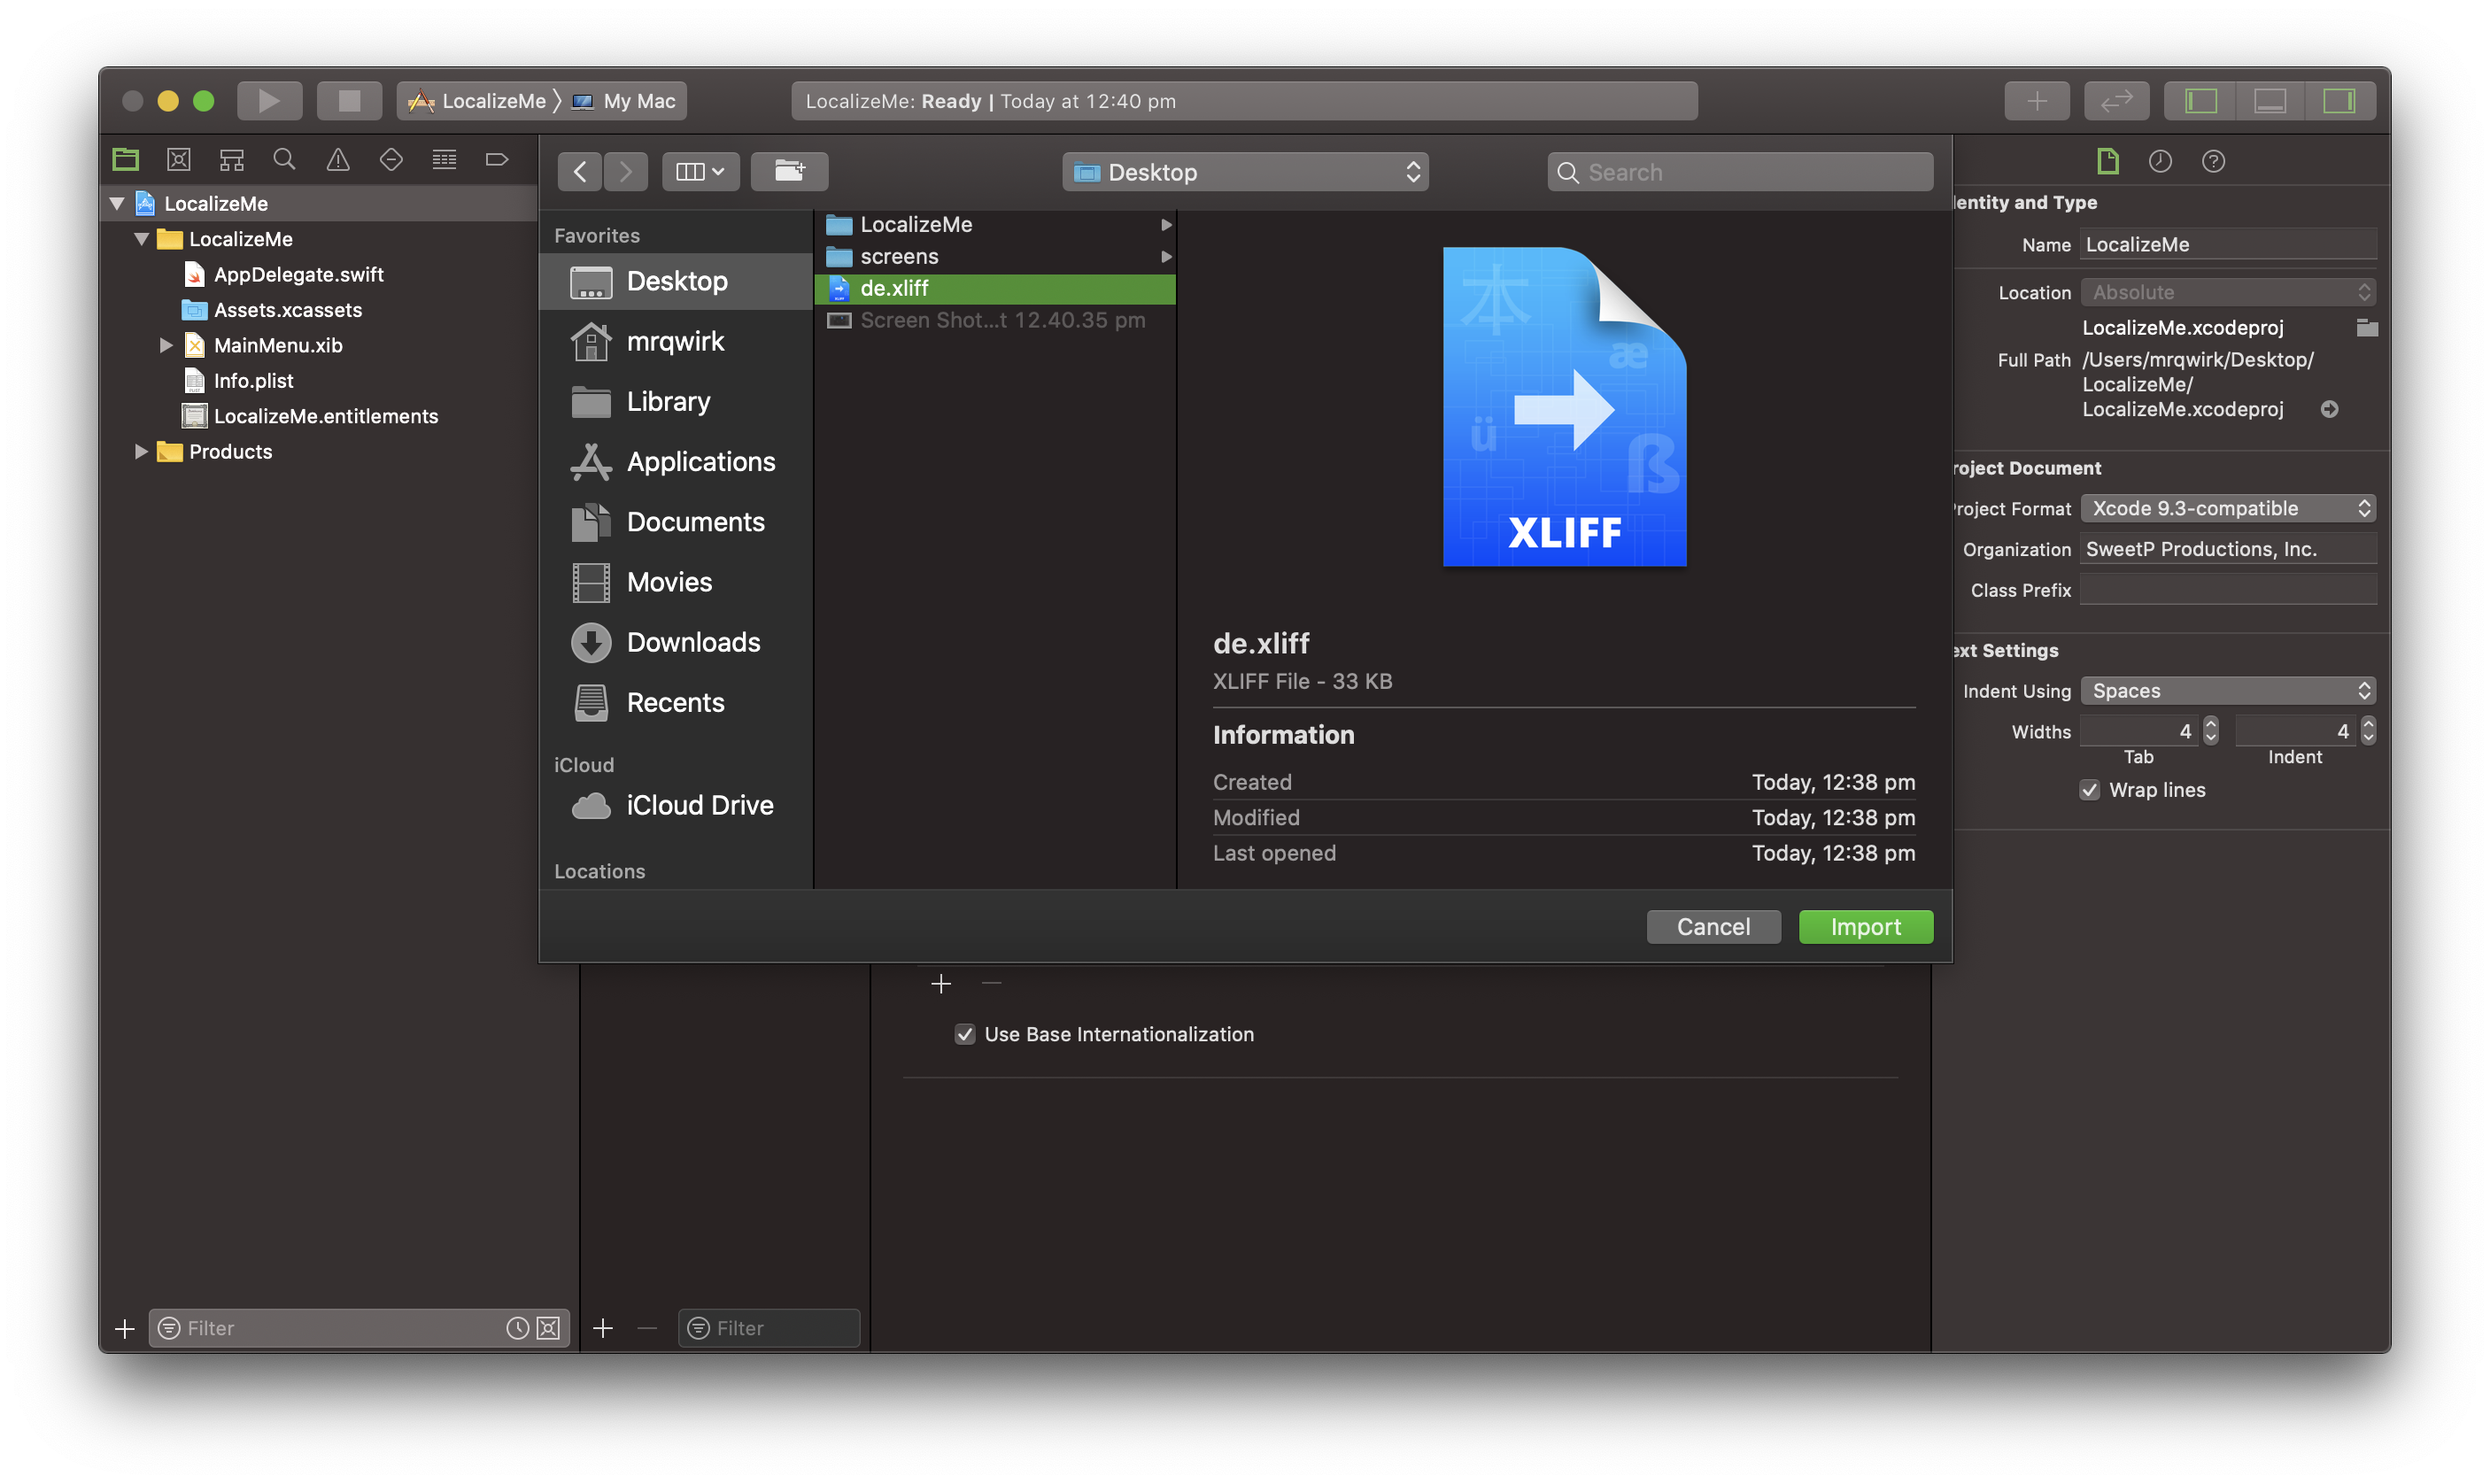
Once you receive your translated xliff file, its only a matter of importing it back into your Project. You do this the same way you exported the file originally. Select your Project in Xcode once again, then head to the Editor menu in the system Menubar, and select Import Localizations.
Rebuild your Project
If all went well, you can rebuild your Project, and change your system language to see all your new changes! All thats left now, is to update all your marketing and Profit! 👍
💡Updates for Oct 2021
Xcode now exports localized files as an .xcloc bundle.
Xliff Editor can open these files directly by right clicking on the .xcloc file, selecting Open With and choosing Xliff Editor The translation workflow is exactly as described above, with the exception of openeing the .xcloc file rather than a .xliff file. 😎