Hiding (and un-hiding) files on macOS is relatively easy. While it is not a recommended method for hiding sensitive documents, it can be a great privacy technique to quickly hide files and folders from casual snooping. Let’s walk through the process of quickly hiding a file.
Open up the Terminal
 Terminal.app - the most powerful app on your Mac
Although the terminal can seem a little intimidating, the process of hiding a file (or folder) is simple enough. Terminal.app is found inside the Utilities folder - within the Applications folder. Upon opening, you will be presented with a single window, and a simple text prompt.
Now, it doesn’t go without saying, that you need to be extremely careful with what you enter into the terminal.
Hiding your file
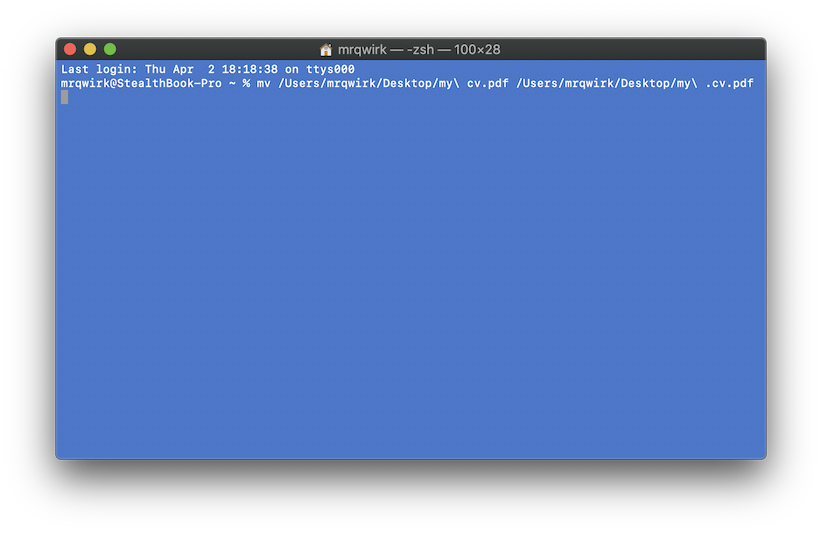 Renaming a file in the terminal
Hiding the file is very simple once you have the Terminal open.
- type the command
mvinto the terminal window (this is unix speak for move) - next you need too add a space character
- now, locate the file you want to hide, and drag it into the terminal window twice (yes twice!)
- in the second instance of the file, add a
.to the beginning of the filename (not the path, but the actual filename) - press enter
Your file should now be hidden from the finder! It hasn’t gone anywhere, it is still exactly where you left it. But, you have just added a . prefix to the name. The . prefix tells macOS that the file (or folder) is a special file, which should not be displayed.
For example, hiding a file sitting on your desktop named my cv.pdf, you will end up with the terminal command:
mv /Users/username/Desktop/my\ cv.pdf /Users/username/Desktop/my\ .cv.pdf
note username will actually be your macOS user name
UnHiding your file
This is basically the opposite of what you just did above; you want to remove the . prefix from your filename. Using the same file we used before, the command to show your file would now be:
mv /Users/username/Desktop/my\ .cv.pdf /Users/username/Desktop/my\ cv.pdf
my cv.pdf should now be displayed again on your desktop!
If you find the Terminal a bit too daunting, you can always try our user friendly app Invisible.
Some useful tips
If you have forgotten exactly where your hidden file is, you can tell the Finder to display all hidden files using the following two commands:
defaults write com.apple.finder AppleShowAllFiles YES
killall Finder
and then to re-hide hidden files:
defaults write com.apple.finder AppleShowAllFiles NO
killall Finder
You can also show and hide invisible files (and other useful commands) using our free macOS utility app DesktopUtility (it’s at the bottom of the page or download it direct here) 👍