A computer is a great place to store sensitive data. Banking details, financial records, business and personal documents can all be neatly tucked away in folders and easily recovered when we need them most. Because we trust our computer with much (if not all) of our professional and personal data, there are a few simple measures that can easily be followed to keep everything where it should be - In our, and only our possession! In this blog, I have already given some tips to help protect your online activities. In this post, i’d like to outline a few simple things we can do to protect our offline data.
Backup!
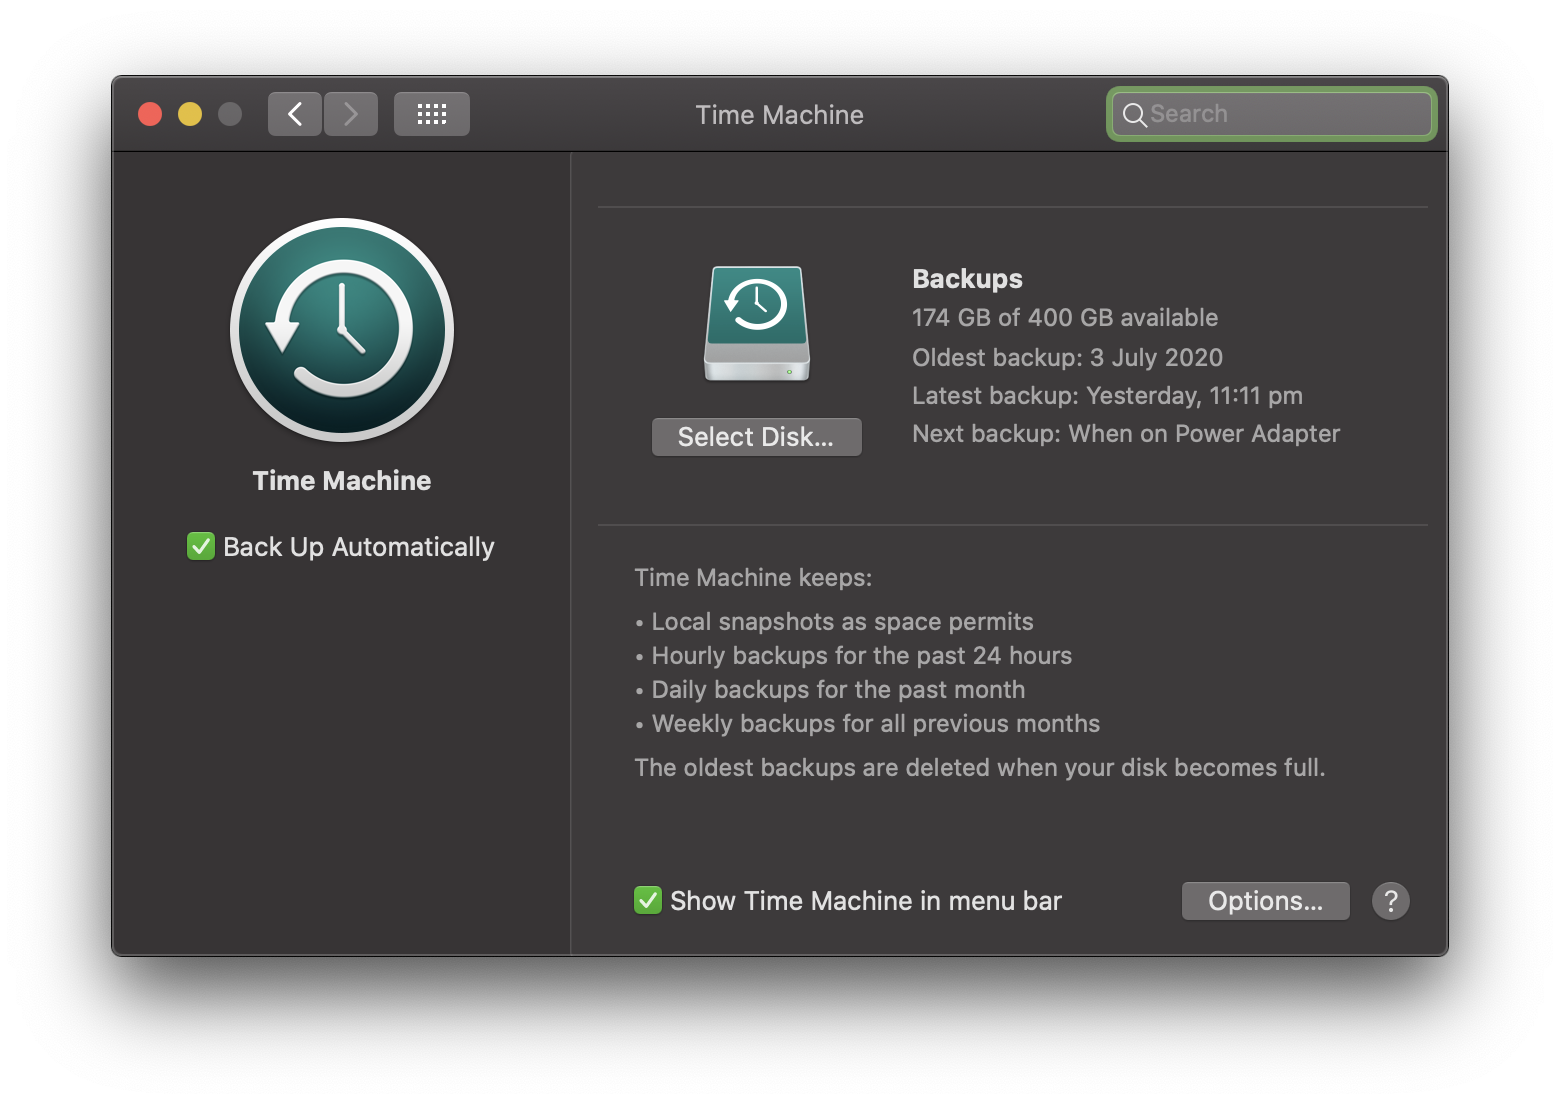 Time Machine - backups are easy on macOS
This is not a super obvious security feature, but if you’re not keeping regular backups… you should be. Accidents happen, things break. Losing access to all your sensitive data could be potentially disastrous. Backups protect against accidental deletion of files, computer failure or theft. With macOS this is super easy; buy yourself an external usb drive, plug it in, and enable time machine in System Preferences. Its that simple. But do make sure to keep regular backups. Get in the habit of backing up daily - after the initial first backup (which can take a number of hours) backups wont take much time at all. You won’t regret it. You can enable Time Machine in System Preferences.
Enable a screensaver password
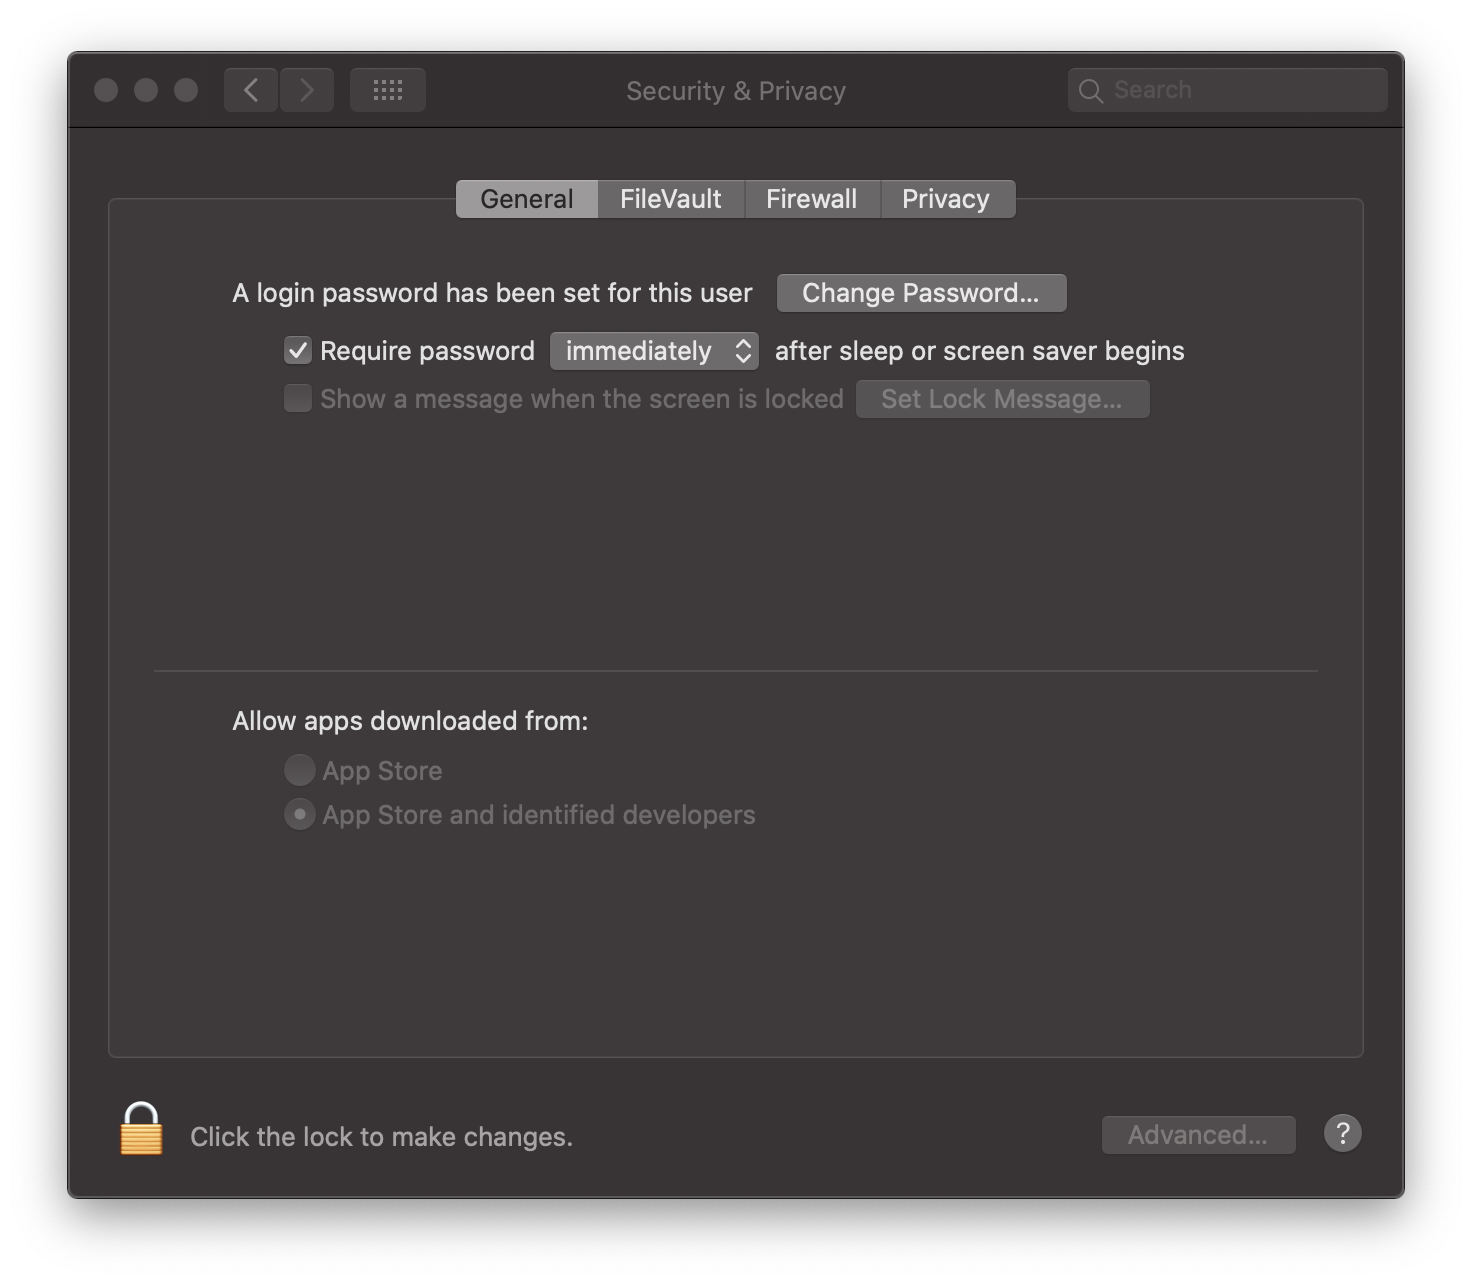 Enabling a screensaver is a great security feature
Most people wouldn’t dream of leaving their house without locking the front door. Enabling a password lock on your computer is a quick and easy security feature to enable. It ensures that when you step away from your computer for a short time, that opportunists won’t have access to your files. Screensaver settings are found on the General tab in the Security & Privacy section of System Preferences. You can easily configure a password, and set the time required before your computer screen “locks”.
Encrypt your disk drive
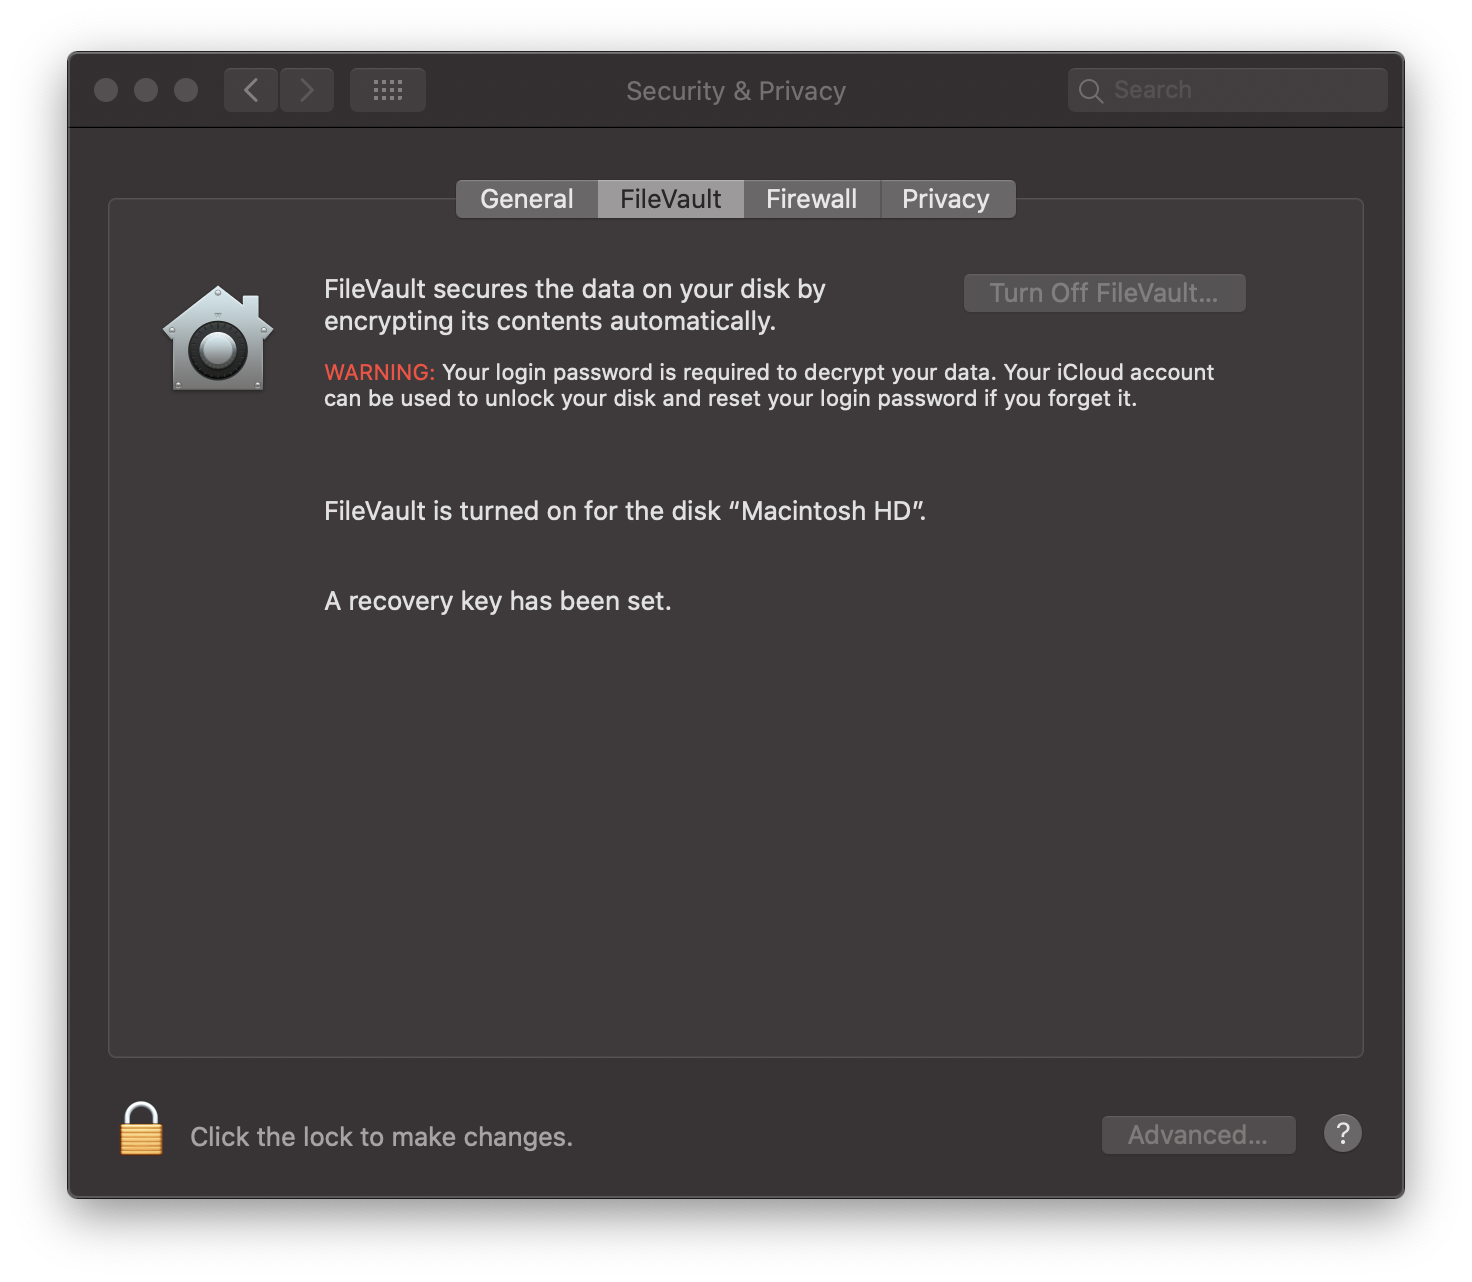 Enable FileVault for improved security
Encrypting your disk drive will give you piece of mind in the unfortunate event your computer is lost or stolen. Your data is safely scrambled and rendered useless for anyone without access to your password. Obviously, you don’t want to share your password!
You encrypt your drive on the FileVault tab in the Security & Privacy section of System Preferences. When you first enable FileVault, it can take some time depending on how much data you have. Its probably best to enable encryption for the first time, when you are not using your computer - overnight might be a good option.
Store sensitive data in an encrypted sparse image
For extra sensitive files, you can go the extra mile and store them in an encrypted disk image. This gives you an extra layer of security, so that even if someone knows your login password, they wont be able to view your private files without also knowing the disk password. We are going to set up a sparse bundle disk image which has the benefit of only taking up the amount of space on disk, as the files it includes. Say for example you initially set an image size of 1Gb, but only have 5Mb of files stored inside of it. The image file will only be 5Mb in size, but can potentially grow up to the maximum size whenever you add more files to it.
To create an encrypted sparse image, you need to open Disk Utility - which is found in the Utilities folder inside yor Applications folder.
- Once open, you create the image by clicking the
Filemenu, then selecting:New Image»Blank Image... - Choose a name for your disk image.
- Change the
Image Formattosparse bundle disk image. - Change the
Encryptionto256-bit AES encryptionand set a password. - Click save.
Now you can put all the files you want to keep extra safe into the disk image. Remember to Eject the disk image when you are done accessing/editing any files inside of it.
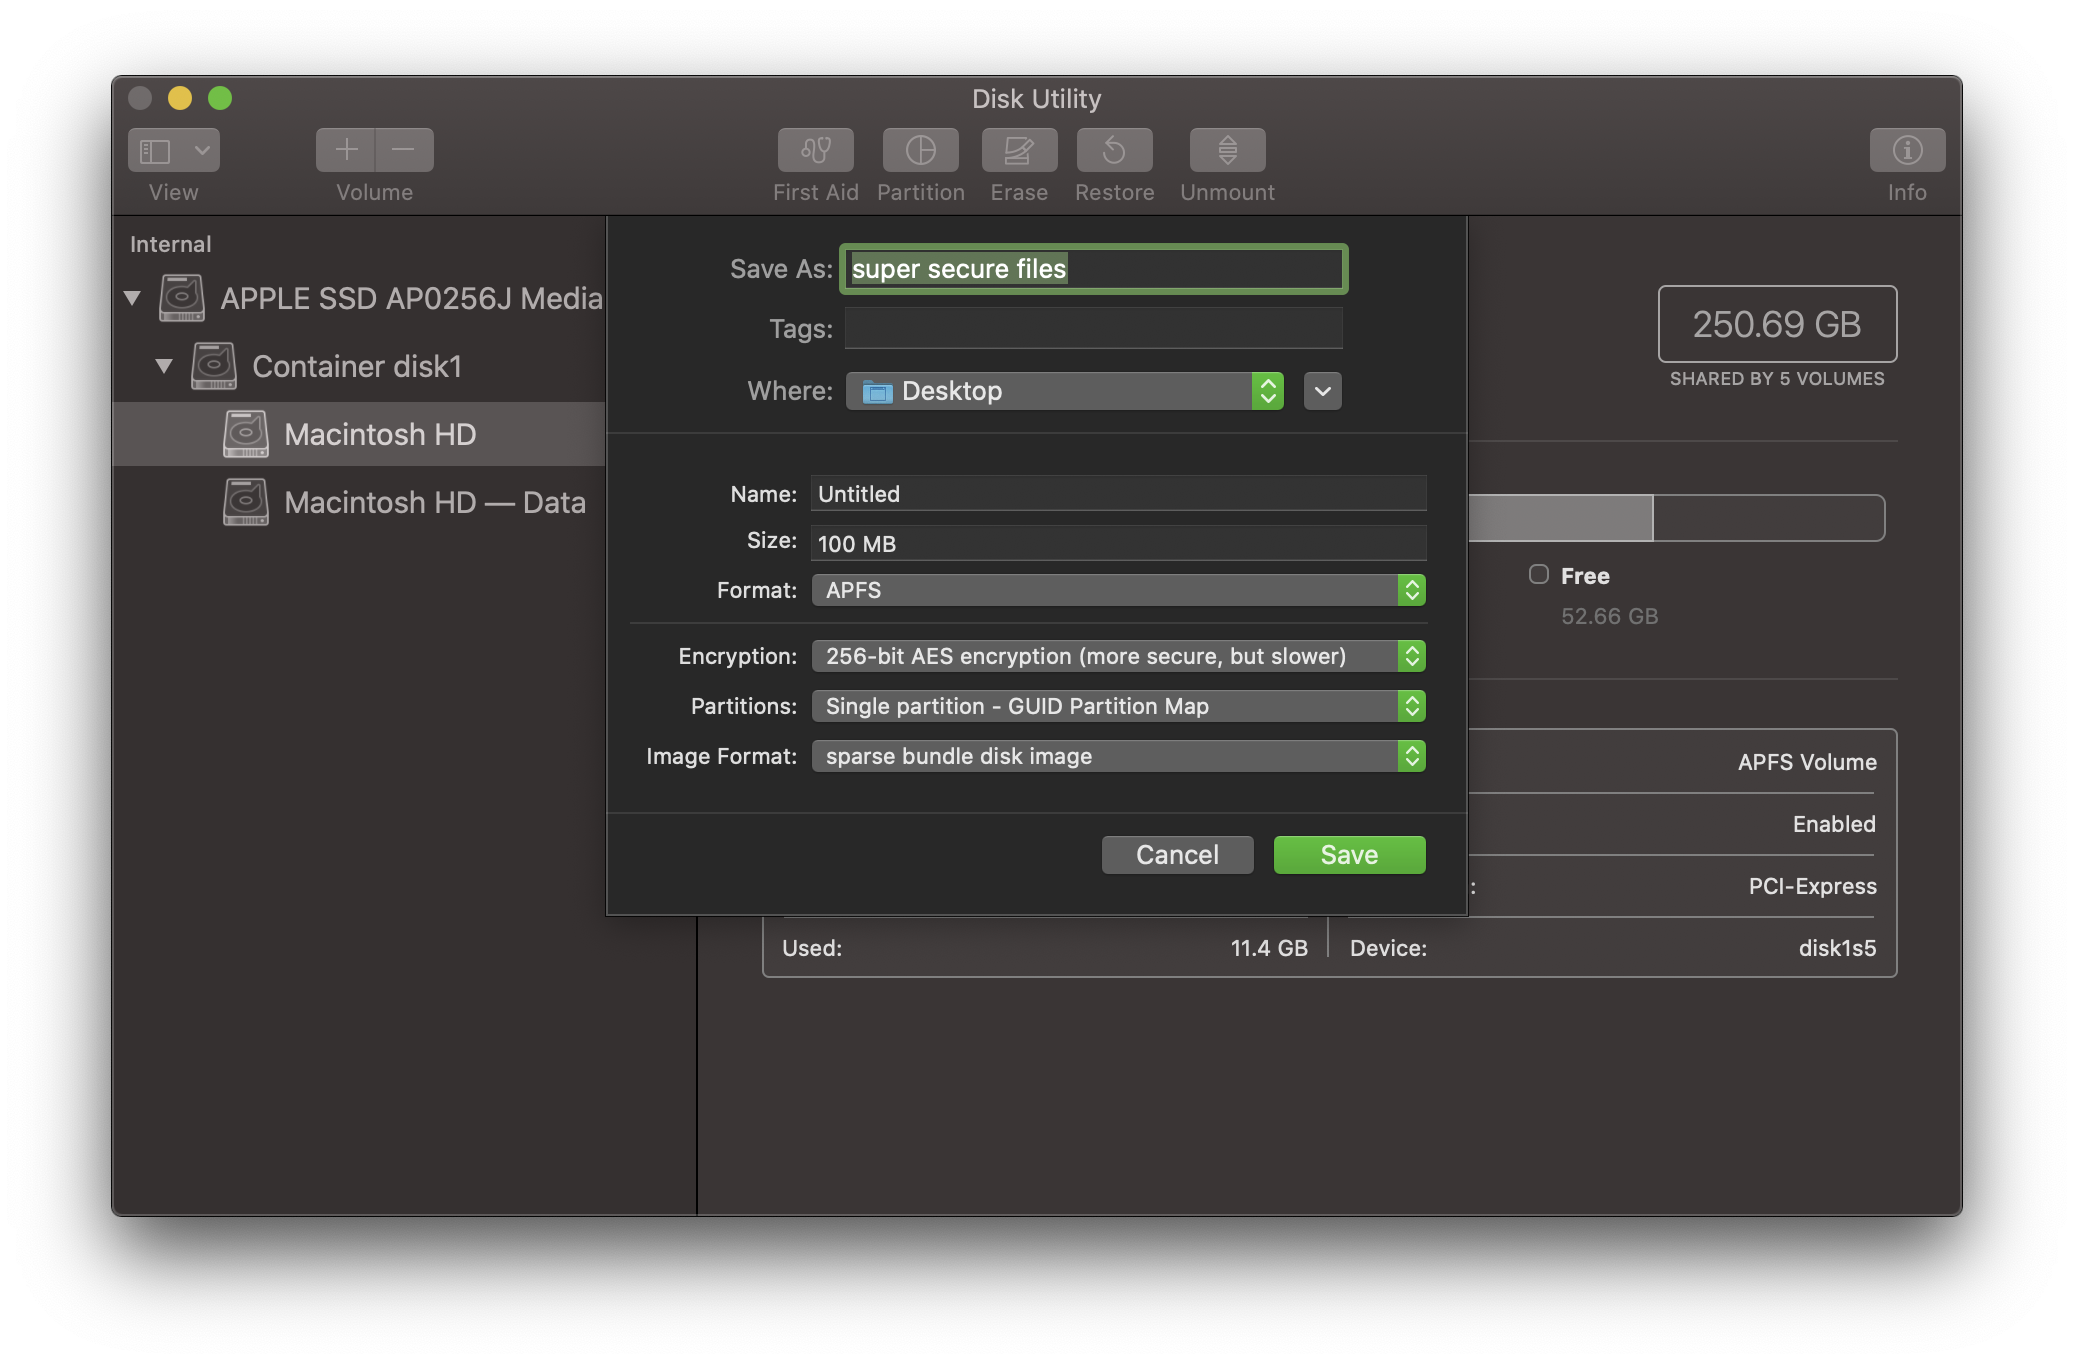 Disk Utility - Creating an encrypted Sparse Image
By following these simple tips, your private data will be more secure. And best of all, all of the steps outlined above are all features that are included in macOS, so you don’t need to buy any third party solutions!